Press Kit Wiki

Hurtworld Update #66

Spencer

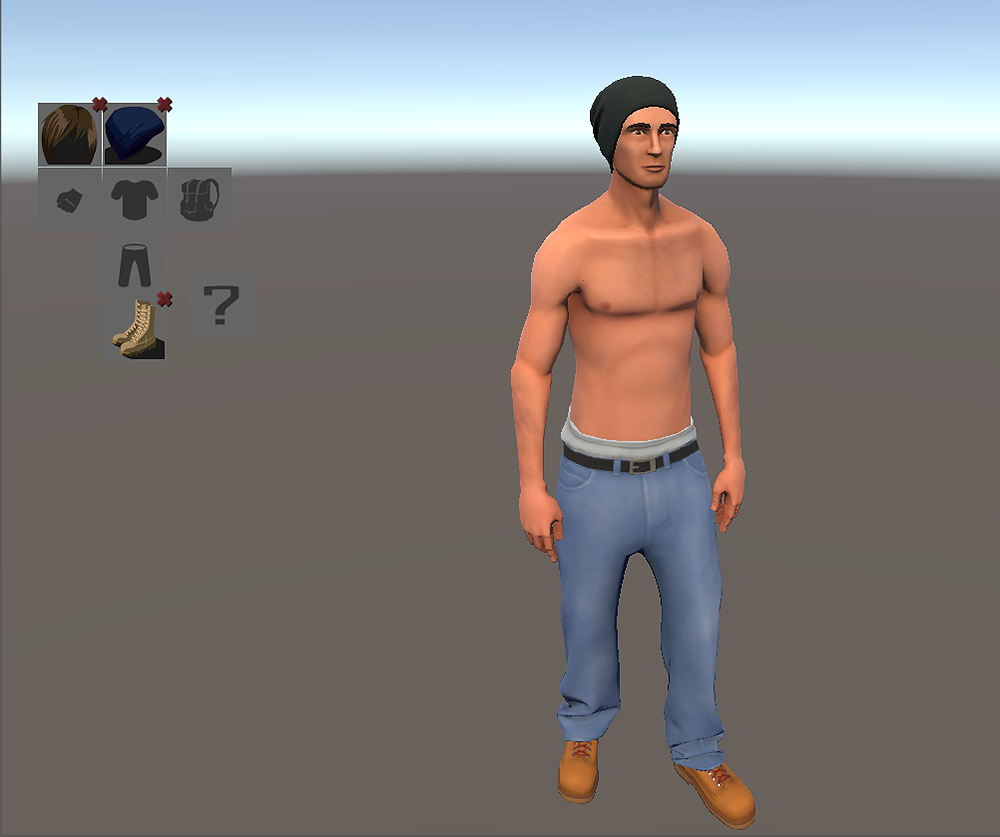
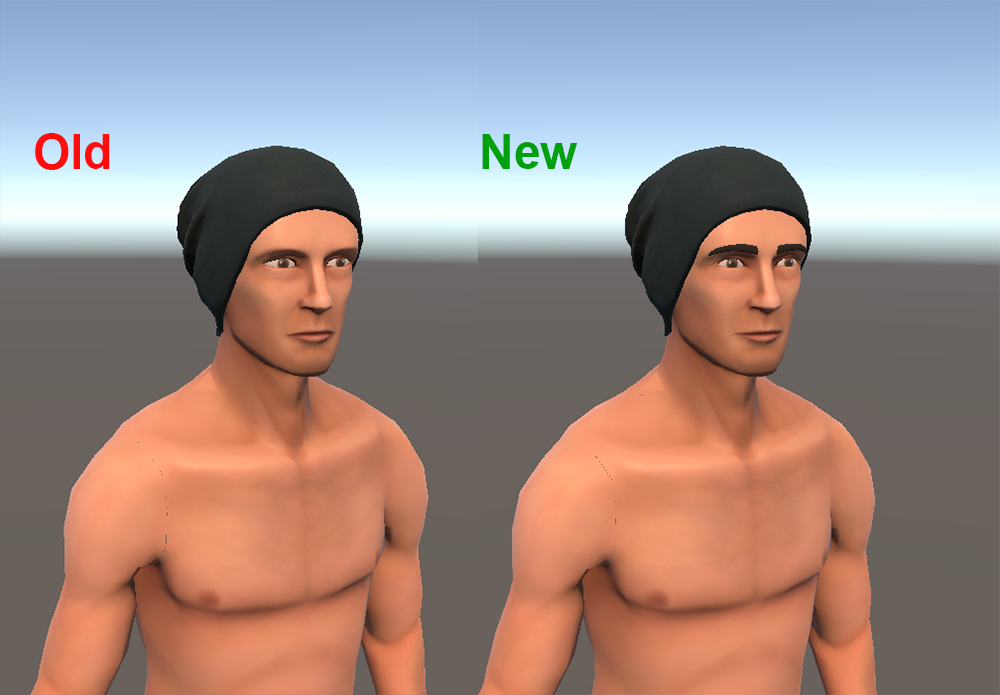
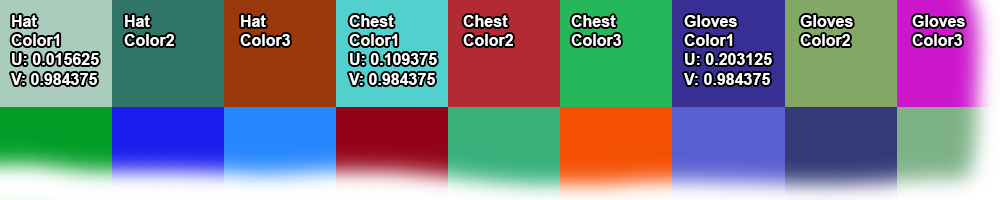
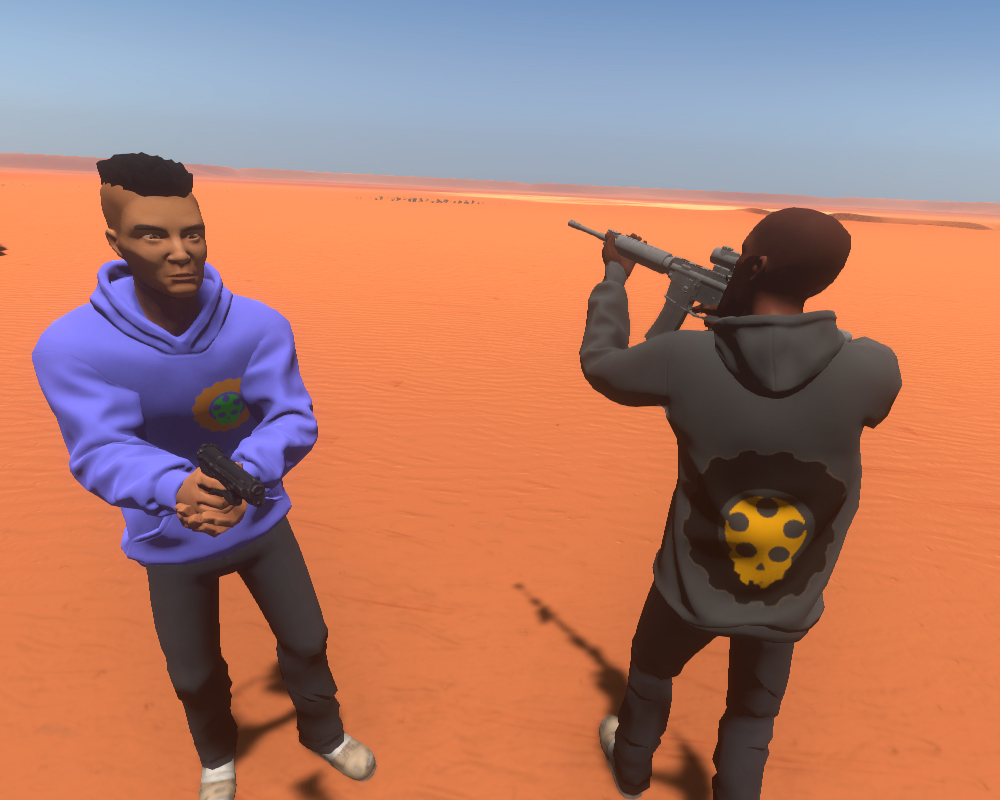
This week I started off working on fixing up how our variable item state is communicated to clients from the server. There were a few issues where our old item authority system didn’t quite give us everything we needed for determining who needs to know about an item. Previously, if you couldn’t access the storage that an item was in, you didn’t really care about it. Now we have situations where another player is wearing an item, and its properties change how it looks. In this scenario we have a second criteria for eagerly sending variable item state to non authorized players. To get around this, I came up with a memory efficient system for determining if a client already has the most up to date version of an item from the server. Then when an item is equipped on a character (this includes vehicle parts), we send its dependent state to all other clients that are subscribed to the characters network lod cell (aka are near it). This is the last roadblock for paintable gear that Tom has been working on.

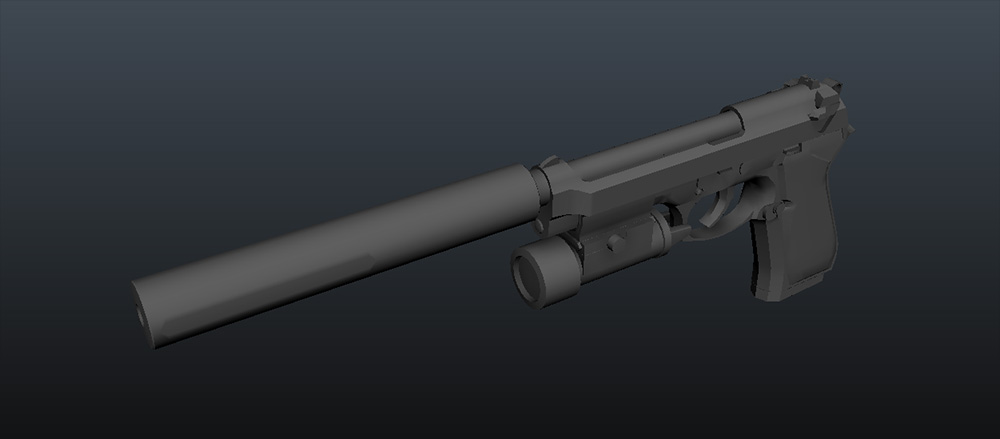
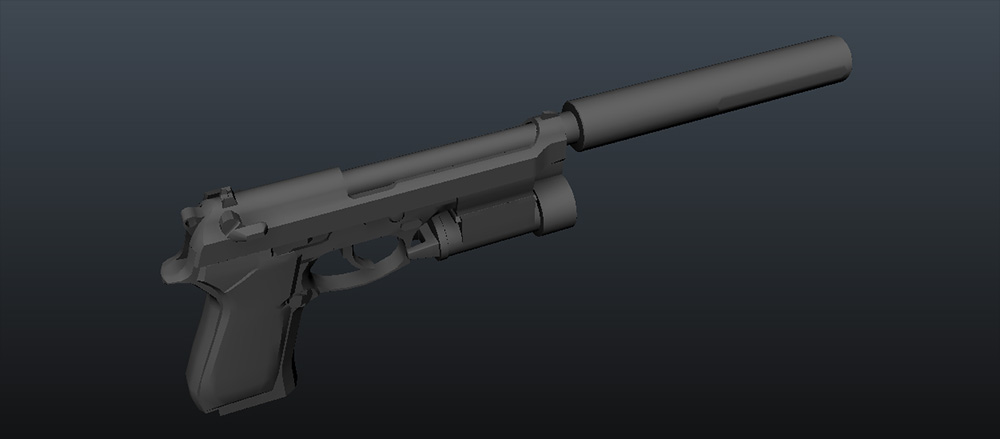
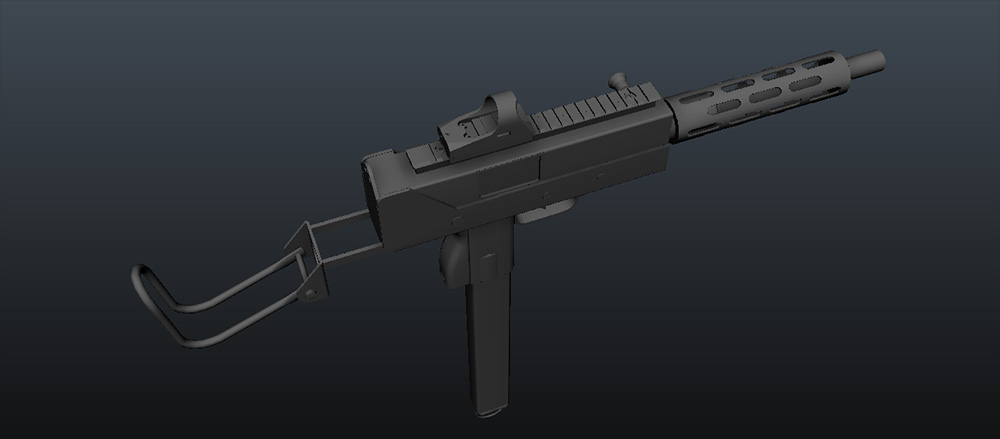
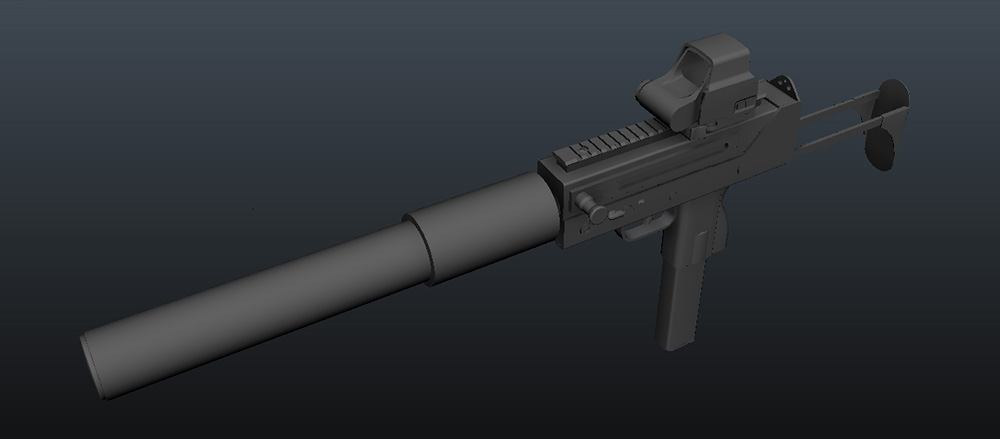
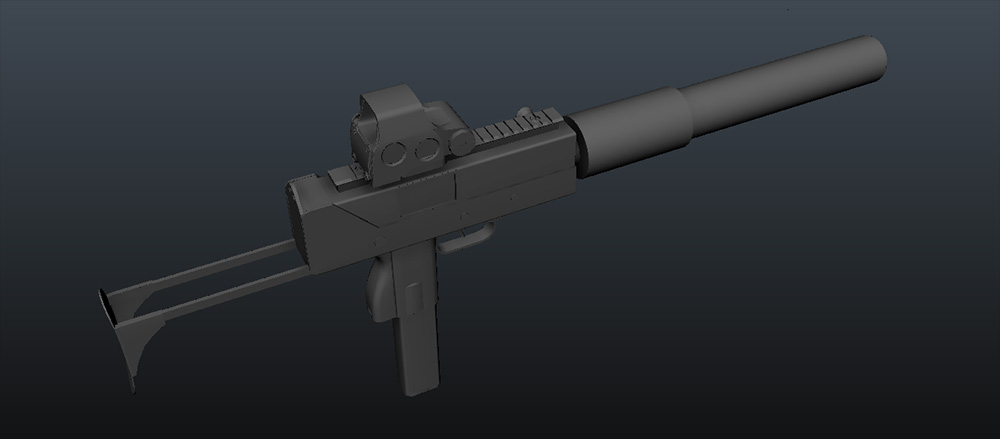
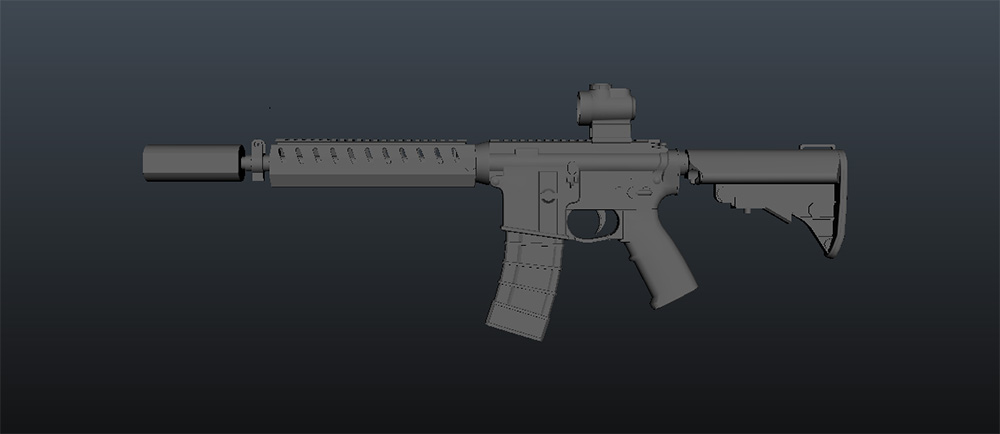
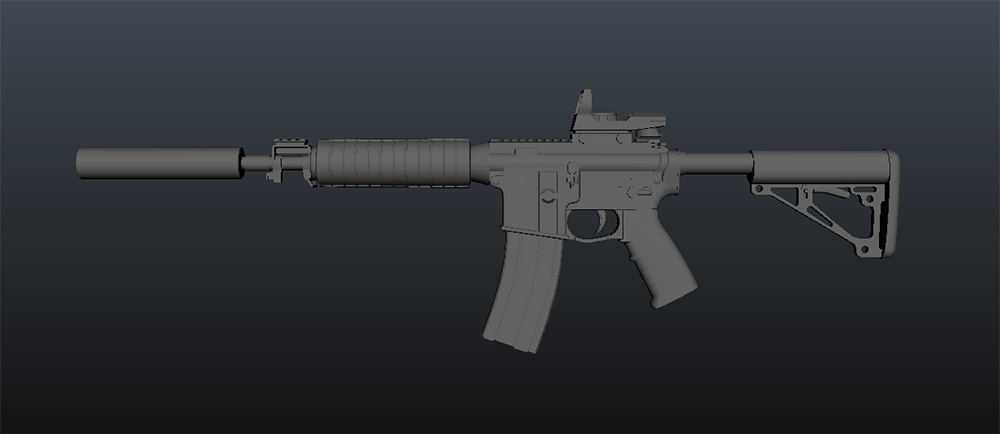
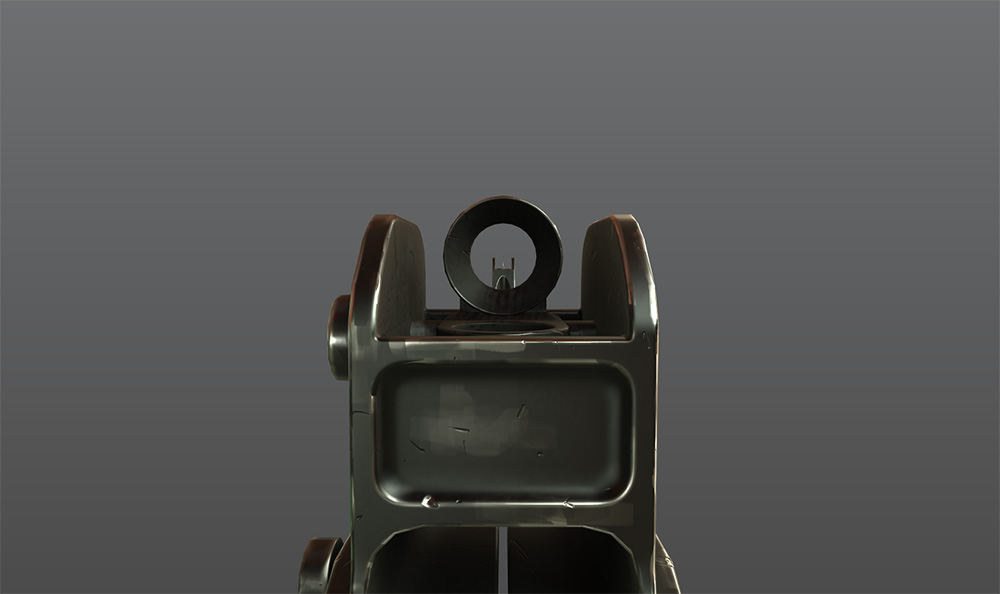
Modular AR Implementation
I also implemented the first modular weapon using embedded items. The UI stuff is all pretty placeholder but it allows things like silencer, sights and magazine mods to be added to a weapon, and some removed. While I was at it, I improved on the item context menu system a bit and added the ability to unload a weapons ammo.
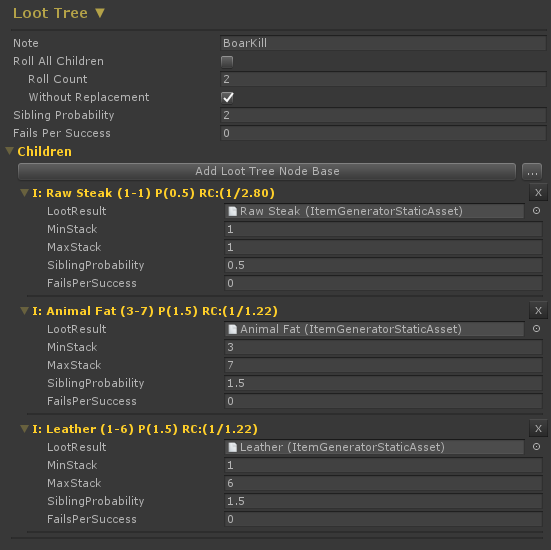
Durability
I’ve now started work on the durability system workflow in prep for the proper ItemV2 loot hunt / progression prototype. I’m hoping to have something very rough ready to play in the next week.

Cow_Trix

Heya everybody. This week I’ve been working on the spawner system, implementing the changes and logic that Spencer and I discussed in our blogs last week. The problem has been an interesting one which I thought I’d briefly discuss.

Now the first question to ask is what properties we want our spawning system to have. Well, firstly it needs to be predictable – a given density map should output roughly the same amount of spawned objects over time and over server restarts. Secondly, it needs to be fast and scalable, as a large map can have up tens-of-thousands of spawner cells that need to be updated in a timely enough manner so that the predictability requirement is upheld. Thirdly, it needs to be unpredictable on the micro level. This is a new requirement that is necessary because of the fact that multiple spawner cells with a free density less than 1 can “share” spawns. With this requirement, removing an object from the spawned objects (say by mining a rock) should mean that the spawner shouldn’t always put a spawned object back in the cell it was, but also try to place it in other areas.

First, a quick rundown of how the spawner system works. Obviously, we only spawn objects where players are in a server, for performance reasons. We split the world up into cells, and pass our spawning system a list of cells where players are doing stuff, and the spawners should be active. Then, we update the spawner cells in that player-activity cell so that they can spawn stuff if they need to.

So this is one of those problems that turned out to be a sort of different problem once I got into it. Collecting many spawns with <1 free space all together to “share” a spawn is basically a packing problem. You can sort of see what I mean with the image below. This is a grid of spawns with 0.5 density that therefore have been paired off by the spawner and colored the same color. The little white boxes are spawned objects. If a square is grey, there are no spawns in it.

pProb2

So obviously we could pack the previous image better, to eliminate those 3 empty grey cells. But unfortunately, our 2nd and 3rd requirements prevent doing this. We don’t have time to try multiple packing configurations to try to minimize empty spaces, nor can we always pack optimally as we need the result to be semi-random. This means that actual spawned numbers of objects will always be slightly lower than the expected result. For instance the image above has 49 cells with 0.5 density, and spawns 22-24 objects when we might expect an optimal 25. I think this slight low-balling is a unavoidable side-effect, but I might be wrong. If I am – let me know!

Next up on the new spawning system is making the actual spawn smarter off the Difficulty value that’s passed to them – making creatures harder, resources rarer, and all that stuff! More on that next week.

Mils

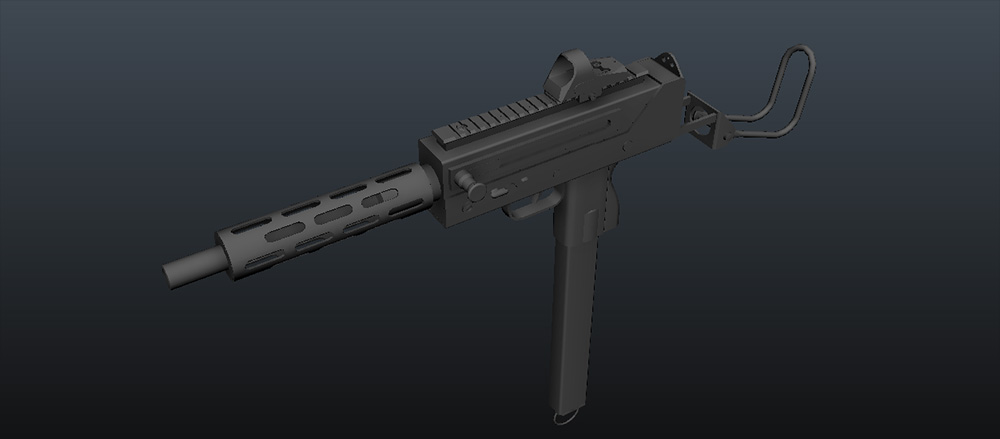
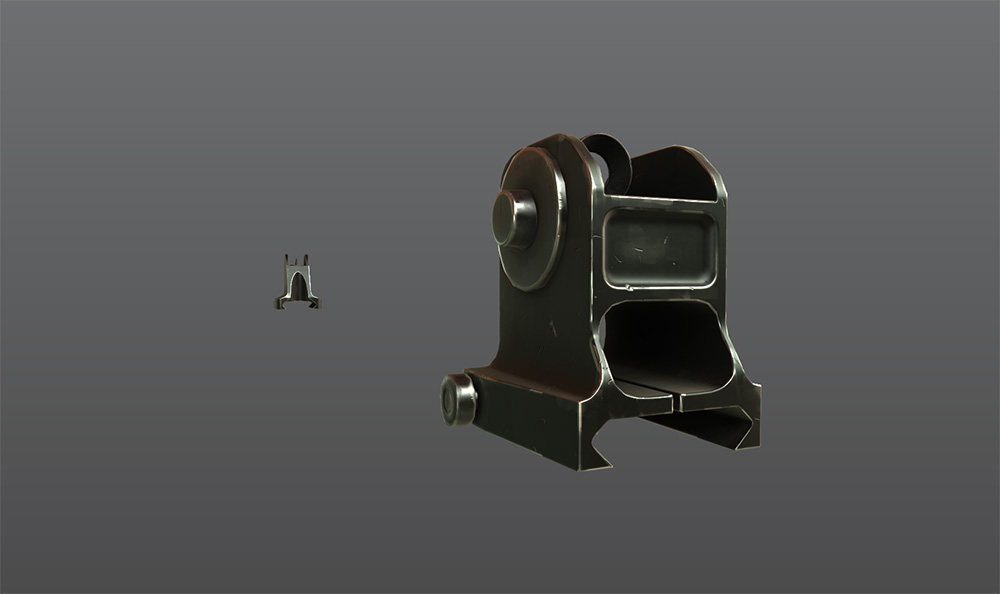
I have been testing PBR textures this week and ironing out the kinks in some new baking workflows I have been trialing. I am experimenting with a mid poly mesh workflow with my normal map baking. This means instead of starting with a low or high poly mesh, I start in the middle which lets me add or lower geometry for the respective models. This I hope will speed up the baking process on the large quantity of bakes coming as I move toward texturing the guns. I find that fixing geometry on the low poly mesh which has a lot of triangles (due to the nature of hard surface modeling) takes a fair amount of time. I feel that a mesh that still retains mostly square poly’s will be easier to turn into a high poly version.

I’m continuing to work on the PBR materials, especially the black oxide coated metal. We want to get a nice balance between believable metal, and our game’s stylistic art.

IronsightsTextTest_0001_Layer 1 IronsightsTextTest_0000_Layer 2

Tom

This last week I’ve been continuing refactoring our mesh baking system and tools. What started as something very player character specific has now become nice and generic. I’d been shoehorning vehicles into the system but it required a lot of special handling and was quickly becoming a bit of a mess, with customisable characters happening and potentially a female character that would require more special handling it was definitely time to clean it up. Now mesh attachment configurations store a list of compatible characters so we can now just throw all the potential mesh attachments into the baker and it will just ignore anything it can’t use making item configurations much easier and less error prone as well as allowing functionality like allowing monsters or vehicles to equip items and have them show as long as their is some compatible mesh defined for their character. It also deals neatly with the female character where some gear can have the same look but others like chest slot items will need a different mesh. Now we also treat the FPS player as another character type so we can remove all our special handling to deal with this.

ColourableHoodies

Speaking of making things easier I’ve spent some time making vehicles easier to configure and much easier to mod. Previously we had all the vehicle attachments stored inside the vehicle prefab with a key to reference it and at startup the vehicle would turn them off and hide them away until an item referencing that key is equipped and it gets turned on again. This means the prefab needs to be configured in multiple locations and also adding a new item (say for a mod) means adding the item into the vehicle prefab and then rebuilding the vehicle pack. Whilst this works it bloats the size of the mod considerably and also makes it impossible to combine mods (say you make a new wheel and someone else makes a new bumper bar you’d never be able to run both mods at the same time). Our mesh baking system uncouples the look of the vehicle from the prefab but vehicle attachments also have hitboxes of their own and may run some of their own logic as well (like a light or an attachable seat) so we still need to be able to attach prefabs to vehicles.
To deal with this I’ve created a new item component that will attach a prefab to a bone in a skeleton when equipped with configurable offsets and scaling.

AttachPrefabComponent

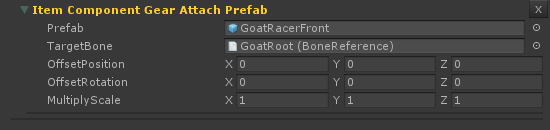
I’ve also created BoneReference objects to reference a bone in a skeleton, these are much easier to work with in configuration rather than using the index of the bone in the skeleton and will also save us lots of maintenance time if we change the setup of the skeleton, if indices need to be shifted we only need to fix the index on the reference object rather than trying to find every place we reference the bone by index and fix it there.

Gavku

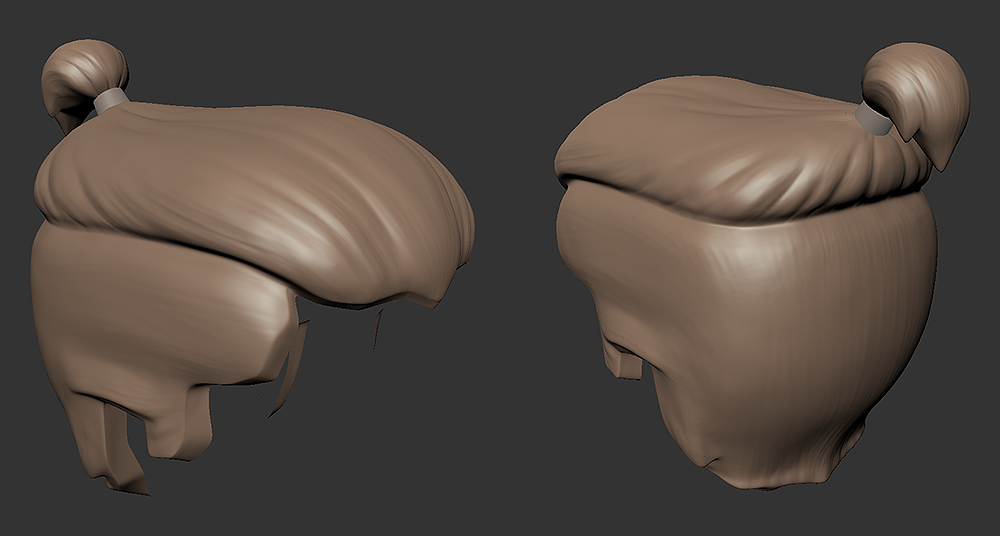
This week I was doing a pass over a bunch of the hair and beard assets. I made sure that there was no longer any eyebrow models incorporated into the hair models, they are now going to be handled separately. As I was already touching these assets I added detail to the sculpts helping with surface variance, and allowing the spec maps to work better.

BeardsG


HairS

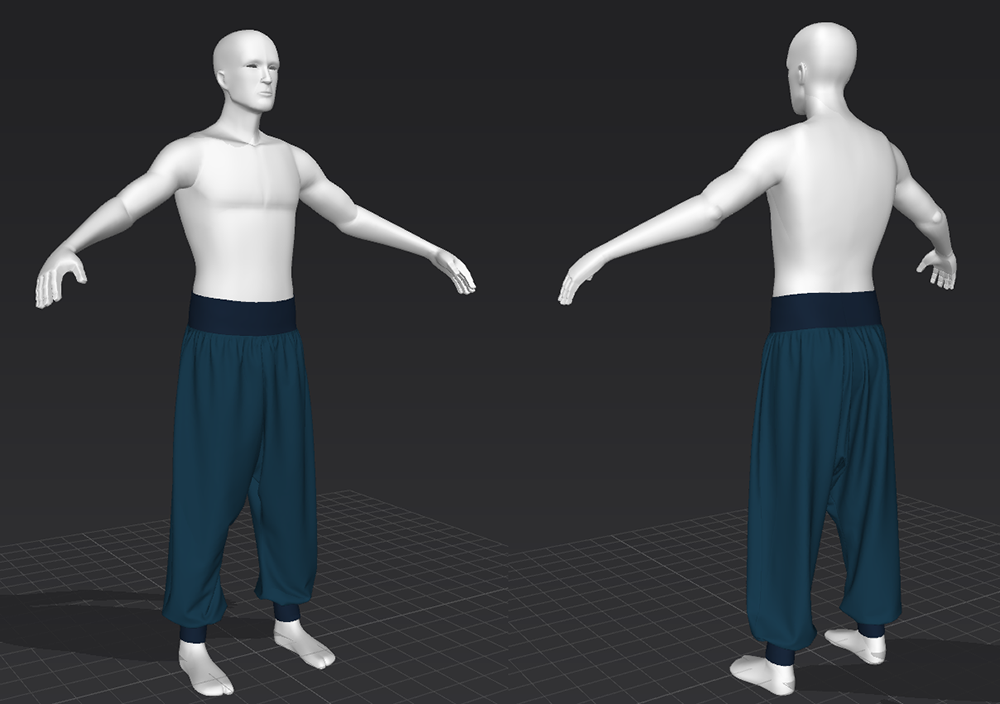
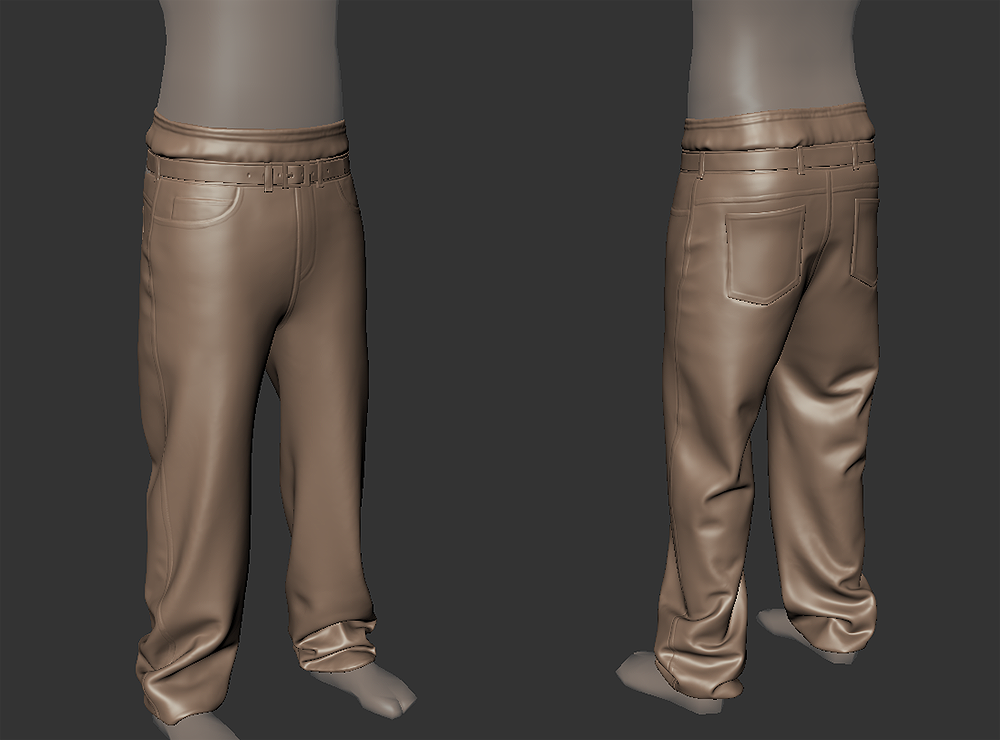
As these have been baking I started work on a pair of Harem Pants. They might end up a little tricky to skin, but we figure its doable and worth a crack 😉

HaremPants

Hurtworld Update #65

Cow_Trix

Heya folks. This week I’ve been working on visualisation tools for the editor, as well as taking a look at a revamping the spawning system.

A common problem we’ve had to solve with the SDK and map-making is displaying large sets of spatial data like spawns and biomes. We ended up with a few different systems that dealt with visualisation and painting of these datasets and it was a bit of a mess, and most importantly just couldn’t handle the size of the data we were throwing at it without reducing the editor to a crawl. The main cause of the performance hit was using the UnityEditor.Handles class to draw the cells in our data, which was a process that had to be done every frame and turned the editor into a slideshow above ~3000 cells. Drawing even a low-resolution biome map in Nullius required around 9000 cells to be drawn, so obviously we had to do something completely different. Another motivator for implementing this was the changes to spawns, which I’ll talk about a bit later.

So, to solve this issue I changed individual calls to the UnityEngine.Handles class to instead building and maintaining a single, hidden mesh object within the scene. This mesh object has a vertex for every cell that holds a color. This single vertex is turned into a quad with a geometry shader, which is much faster than having to build every vert manually and means we hit the 65k limit much, much later. This works really well, and means the only real workload is when we invalidate the mesh. Check out this gif of painting on the map!

So these improvements were partly because of discussed changes in the way spawn maps are going to work, which meant that this part of visualisation and painting really had to be up to scratch. One of the problems right now is that spawns are really tied to the map – you look at an area and you say “I want exactly 3 iron rocks to spawn here”. This works, but it makes balancing difficulty. Spawns are one of the things that most server-owners play around with, so we want to defer those decisions as late as possible. So, what we’re more shifting to is a spawner based around two maps – density, and difficulty. A density map will do roughly what the spawner map did before – say how many objects there should be in an area. However, we’re going to implement a system that supports non-integer and <1 values for these cells, so, for instance, two cells next to each other with a density of 0.5 will try to have 1 object spawned between them. The difficulty map – see below – is a general value that will determine what will be spawned in an area. So, for instance, a high difficulty value for a creature spawn would make it be a harder creature. This gives us a lot more easy knobs to play with to balance a level.

DifficultyMap

Mils

Adding more parts to the Mac-10 and new parts to the existing Beretta this week. They look really nice even at this level, the techiness is really satisfying to look at. I’ll be testing some UV unwraps a little this week and continuing to add parts to the Beretta. I want to get the texture scaling right when you are up right near the Iron Sights and various Scopes.

MAC10andBeretta_0001_Layer 7 copy 4 MAC10andBeretta_0000_Layer 7 copy 5 MAC10andBeretta_0005_Layer 7 MAC10andBeretta_0004_Layer 7 copy MAC10andBeretta_0003_Layer 7 copy 2 MAC10andBeretta_0002_Layer 7 copy 3

Gavku

So I finished off the Low riding jeans, and did a temp skin on them.

LowR

I also did a bunch of clean up of my assets within the project, organizing things and updating head assets like hair, beards, masks etc to make sure they fit correctly, skinning them and baking them. I did a pass over the player face as he had a sort of creepy thousand yard stare, and tweaked it to give him a slightly more friendly look. The changes were subtle but still enough that they caused errors in the game mesh that meant I had to go back change the sculpt, re bake his maps, re skin, and re bake his game mesh to test. His eyebrows were also replaced.

FaceTweaks

I also spent some time cleaning up and reorganizing a bunch of my work files so that if someone else need to access them they can tell what is what. This involved placing files in easy to find folders and making sure that PSD’s have correctly named layers. I am currently going over the spec maps for hair sets, then will jump onto some more player items.

Tom

I’ve spent most of the last week continuing on with work on the customisation system. It’s been pretty tricky to develop a system that meets all of our requirements but we are getting close. We wanted a system where the player can colour their gear on a per item basis and where items using the same shader could be combined into the same material to save on draw calls.
Our current vehicle customisation system wasn’t quite up to the job as its customisation works on a per vehicle level rather than per item (ie. the vehicle has 3 colour slots rather than each vehicle attachment having its own colour slots).
Whilst we could use the same shader to colour the gear after baking it all together if we want to use the same material to reduce draw calls we need a way to tell different parts of the baked mesh apart so they get their own individual colour customisation (ie. colouring a hat slot and a chest slot differently), this is further complicated by the fact that GPUs don’t deal well with branching if the condition is changing within the same draw call (so we can’t do conditional selection based on the type of gear).
Our solution is to create a small texture with 3 pixels reserved for every item type to represent the 3 customisable colours, we then use an extra UV channel in our mesh to find the customised colours (UVs are texture coordinates that are used to map textures onto a mesh, they are normalized between 0 and 1 so they can map to any sized texture, 0,0 is the bottom left texture and 1,1 the top right). Zoomed in our texture would look something like this (without the overlay text).

ColourLookup

The UVs are slightly offset so they match to the center of the pixel rather than the corner. I’ve only listed the UVs for colour1 as this is all that the mesh knows about, the other two colours are retrieved by the shader automatically shifting the pixel over. We are using a 32*32 texture, giving us 1024 pixels meaning we can represent 341 items with 3 customisable slot colours at a time. When an item with customisable colours is equipped it sets the pixel colour depending on its slot type.
Now if we combine the other textures together into an atlas we can use the same material for multiple bits of gear allowing us to batch things together efficiently reducing draw calls (each material is at least one draw call depending on shader).

I’ve also been adding a new shader for custom colours. Previously we were saturating the diffuse texture with the custom colours based on an rgb mask where each rgb channel corresponded to custom colour 1,2 and 3 respectively. The amount of saturation was based on the brightness of the colour channel in the mask. The new shader doesn’t use saturation but just a simple blend instead. Now we use the brightness of the mask colour channels to tint the custom colour (see how in the example below the overlay colours fade to black towards the bottom) and added an alpha channel to the mask that controls the blend weight. This method doesn’t require a desaturated diffuse texture and gives more control especially when blending into and out of the mask.
Here’s a demonstration where purple, yellow and green have been picked as the three custom colours.

ColourMasking

Spencer

Good progress this week, we had our first internal play test of ItemV2 in survival mode. Still a broken mess, but marks us being pretty much on par with the master branch feature wise. I pushed out an update mid week to the ItemV2 Experimental build which contains the new assault rifle model and the broken survival build.

I’ve had my design hat on for most of the week, fleshing out the details on how gun attachments work, how you find them, what can be removed / added vs what is fixed.

Unfortunately as this is all theoretical design, I have no pretty pictures. Just a wall of text.

I’ve gone over the ItemV2 details in the past, but it is scattered through lots of posts so I will re-summarize here:

Recipes

First of all, the below is designed and balanced for full loot aka no infamy. The objective is to shift some of the gear progression storage to things inside your base, making it less painful when being killed deep into a progression without taking away the punishment of death. Also giving other players valuable item drops while limiting their value should they kill you.

Recipes for Weapons, Gear and Tools beyond the very basic will be obtained in the world by killing animals, looting ruins and gathering resources. You can think of this as the loot hunt similar to something like Diablo, where instead of finding a complete usable item, you find a blueprint to a specific item.

Every blueprint generated by the loot system will be unique. You will be able to see the stats of an item before you attempt to craft it. Blueprints with better random rolls will be more expensive to craft.

One blueprint will give you a limited amount of uses before being destroyed.

Each blueprint will need to be loaded into a dedicated crafting bench, and once loaded can not be removed.

All tools and gear will have durability, after a set amount of use will become broken.

Crafting benches will be able to repair items if the item’s blueprint is loaded into it. Meaning only the creator of an item can repair it.

Weapon blueprints will contain roughly half of the weapons attachment configuration. The rest will be able to be added and removed on the fly.
Example – Assault Rifle
Blueprint generated will randomly roll a lower receiver, barrel and stock. These items will be generated at blueprint time, with randomized stats and will be fixed for the life of the weapon.
Additional items can be attached for: Silencer, Sights, Scope, Magazine which will modify the stats and operation of the weapon further.

All parts of the weapon will be paintable with custom patterns and colors.

Map Spawn Generation

To support the large progression we are working on, we need to move away from manually configuring each individual creature, loot table and placement in the map. We are moving towards a more semi procedural solution where we specify difficulty of an area and the density of each type of spawn we want and we let creature and resource generators do the rest with algorithms. Cow_Trix has been working on the source data for these systems, I have been working on taking that data and spawning things.

The objective is to have our systems determine something needs to be spawned based on density and difficulty, and pass a set of parameters into a random creature or resource spawner which can be configured to generate all sorts of variations on creatures and gatherables.

An example would be, instead of having 3 different types of Tokar hand authored, we specific ranges of damage, speed, colors, mesh additions like horns, and sounds that occur at different difficulty settings and let the creature generator spit out a random variation based on a few dice rolls. At this point we could also inject rare spawns into the config, so we could have a rare albino Tokar spawn anywhere in the map a very small percentage of the time.

With random creatures, we then need loot to match. With too much configuration requirements we usually end up copying stuff from other loot tables and changing them slightly (hence the higher level tokars that are pretty much the same).

To follow on from this system, we will pass the spawn information we used to create the creature to the loot table once it is killed, allowing us to automatically scale up the loot dropped depending on the difficulty rating and rarity.

I see this as being a very important step towards pushing out our content by orders of magnitude. We want to push towards 50+ tiers of loot instead of our current 4 or so.

Nested Items

I’ve also been working on the implementation of items being able to store other items. Initially I was going to make all loot generated at blueprint stage and fixed for technical reasons, but as I just know everyone is gonna want to modify their weapons a lot, I decided to change the way we are going to do attachments.

Attachments are now item instances that can be “equipped” on a root item.
Eg: An assault rifle lower receiver will have multiple child items in the form of a barrel, stock, silencer, magazine, scope etc

This will also make modding for weapons a heap easier as modders will only need to make an item that fits the silencer slot of the AR to integrate it into the existing game.

tl;dr: Cool stuff coming

Hurtworld Update #64

Spencer

This week we’ve been focusing on getting our survival systems back to baseline for ItemV2. I’ve been putting off re-implementing the legacy progression as most of it will change soon, however its been hard to get a grasp on what needs to be fixed while we can’t play the game. So cow_trix and I have spent most of this week fleshing out the basics needed for simple survival. For me this included bringing AI into ItemV2 land, and implementing a new loot table system that is based on ScriptableObject assets instead of hardcoded C# files.

Just like all our other asset based configuration data, these loot table files will be inside the SDK and will be easy to tweak and replace without any coding or oxide knowledge.

Here is an example of the first cut loot table configuration:

boarloot

I also implemented the new AR15 mils has been working on, I will push it out to the Deathmatch branch tomorrow.

Mils

I have been adding components to the AR15. There are two sets of parts now for it, we are testing the parts in game to see how they feel so that I can get the go ahead to texture them. I’ll be making parts for the Mac-10 this week and maybe looking at other guns too.

AR15Bits_0000_Layer 2AR15Bits_0001_Layer 1

Gavku

I am currently finishing of a pair of low riding jeans with player boxers peaking over the top. Below is a picture of the pattern from Marvelous Designer, with the white parts being the boxers, and the blue the jeans. It took a fair bit of noodling around, activating the sim, pausing, pinning, repeat to get them to sit right. I had a placement belt which I later replaced with one I made in max.

MD_LowRiders

This is the resulting sculpt in Mudbox. I am currently retopologizing and finishing of the low poly.

LowRiders

Cow_Trix

Hey folks. This week I’ve been working on getting Hurtworld back to baseline survival.On my end this has meant getting navmesh generation working in the SDK, setting up Nullius and solving some regressions in map generation, laying out spawns and loads of bugfixes.

First up was a bit of work on my road tool, fixing some issues with generation where a connection between two nodes would sometimes be “flipped”, so that if you asked it if a point was within or outside a connection, it would always get it wrong. This meant that some connections wouldn’t affect the terrain properly. I also figured out a bit more how to use the Unity Editor’s ideas of selection and focus, which solved a lot of bugs around clicking on nodes and selections and Unity instead selecting the objects behind those objects. I also fixed some issues with how meshes were stretched along the spline – I was previously using the natural time of the spline to translate the mesh points along it, but this led to some weird artifacts, so I changed it to a uniform time.

I’ve been trying to get the basic elements of Hurtworld running in the new map – gathering, crafting, hunger, and heat. This meant getting all the spawners up and running, all the biomes configured, and all procedural. There’s still a couple of things we need to do to make generation completely procedural, there were a few things I was left doing by hand at the end of the process. There’s just no comparison with the pipeline we used to have though, things are a lot easier.

Something we can do really easily to play around with increasing biome difficulty as you move around is Overlay biomes. These mean you can have a root biome, which is your starting point for things like temperature, effects, hazards, and lighting settings, and then permutate it as you move out to harder areas instead of having to make an entirely new biome from scratch. So, instead of having to specift a MildDesert, MediumDesert and HarshDesert each with their own set of properties and settings to maintain, we can instead have some BaseDesert biome that specifies our baseline, and add Overlay biomes that for instance increase the temperature by 10 degrees across the board while making the sunlight strength higher.

At this point Nullius is looking pretty good. While the map is still pretty basic in it’s spawns and and probably a little too forgiving – there’s about 4 resource nodes every couple of meters at this point – it’s a substantial step!

Tom

This past week I’ve been working on integrating character customisation into ItemV2. Our design is to interrupt a player’s spawn (both loading into a server and respawning after death) with a window presenting the customisation options. Once the player has picked their setup they’ll spawn like normal once the spawn timer is finished (the spawn timer also runs in the background while you pick your look).
Currently you can pick between the base types that Gavku has been previewing over the last couple of months (Current default, female, asian and african) along with different hairstyles and beards depending on the type.
We also plan to let you pick hair and eye colour here but as of writing I’m still working on it.

Customisation

Working on this exposed some problems with our mesh baking system so I had to dive back into it to decouple materials from mesh attachments, create a new layer of abstraction with a mesh configuration object to allow assigning materials to mesh attachments and then add another object abstracted above that, that defines the setup for an item, referencing groups of mesh attachment configs for both first and third person (many items have a high detail version for first person view as they take up a large percent of the screen and we can guarantee there will only be one at any time so the performance costs aren’t bad) as well as a mask that can turn off parts of the base mesh (for example, turning off the torso and arms while a jumper is worn).
This new setup is a lot more memory efficient, we no longer need a new mesh for each material variant and items just hold a reference to a configuration object rather than multiple references to all the mesh attachments it’s using.

So far it’s coming along well, I’ve got the spawn interrupt and base type, hair and beard picking working and synchronizing over the network, now with the mesh attachment baking in a better format I can move onto colour picking both for hair styles as well as gear.

Dev Blog