Press Kit Wiki

Hurtworld Update #48

Cow_Trix

This week my SDK work has extended into reworking the biome, weather and skybox system (it’s really sort of one system, so the reworking encompasses all of it). I also kept fiddling with and making some biomes. Check out this WIP mountainous biome!

rainy-mountaoms

This refactor will enable users to specify custom biomes, weather systems and biome-influenced client effects in the SDK, something that was previously impossible.

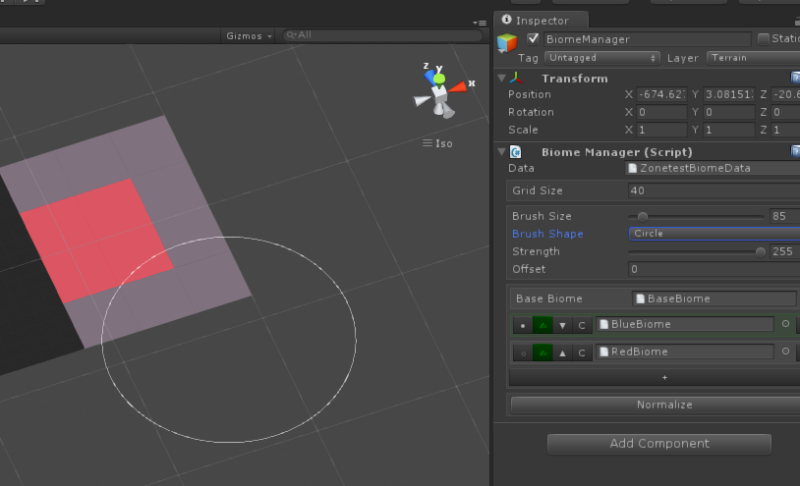
The first thing that needed doing was rethinking the usability of the biome tools we have in place. While the ShigiTools biome tool was usable, it wasn’t super user friendly. While that will still be an option, we now have a MapMagic output that will work as well, and a biome painting tool in the editor.

biomepainter


Biomes have changed a bit in how they work. They are no longer concrete enumerations that are linked to a script that builds how they work. Now, their configuration is entirely serialized and configurable, everything from the color of the sun to the temperature to if you want it to blast a gazillion units of radiation every day at noon for an hour. A map will now have a ‘base biome’, which acts as a fallback for when there is no mapping for the cell a player is in.

We also upgraded Time of Day, the skybox plugin that we use for skybox rendering. There are some pretty nice features in it, like a cool atmospheric scattering effect, which might make the world look a bit prettier with minimal effort. Also, the latest Time of Day implements natively animated parameters. This means things like if you want the color of the sun to change throughout the day, this is now much more viable. Previously we had to implement this ourselves with this whole layer of abstraction, and now we don’t need to, which makes the whole system way cleaner and better. However, it did lead to an interesting performance issue.

One of the requirements for a skybox is interpolation. A cell can contain an arbitrary amount of biomes at different strengths. You need to interpolate, or tween, between the configurations. This was easy to do in the previous version of Time of Day, because all the configuration was structs or value types so we could do quick lerps without allocation. However, Time of Day implements animated colors via the UnityEngine’s Gradient class, which contains two arrays of the color keys and alpha keys, meaning it’s allocation city. I experimented with pooling these gradients, but it was kind of a rabbit hole. Just getting the alpha and color keys of a UnityEngine.Gradient allocates memory. So I took the interpolation back to the drawing board.

What I really needed, I thought, was the ability to apply a weighted normalized stack of skybox configurations to a weight. A weighted normalized stack in this context is just a mapping of biome to weight, which is a number between one and zero, where all the weights combined add up to 1. While before I was crunching this stack down into a final object – meaning I had to lerp UnityEngine.Gradients, meaning allocation – if I instead just stored the necessary information of the stack and processed it as I went, then I didn’t really need to store the result of the stack anywhere. This works great! We can interpolate between arbitrary amounts of biomes, it’s fast, and we’ve reduced memory allocations to zero.

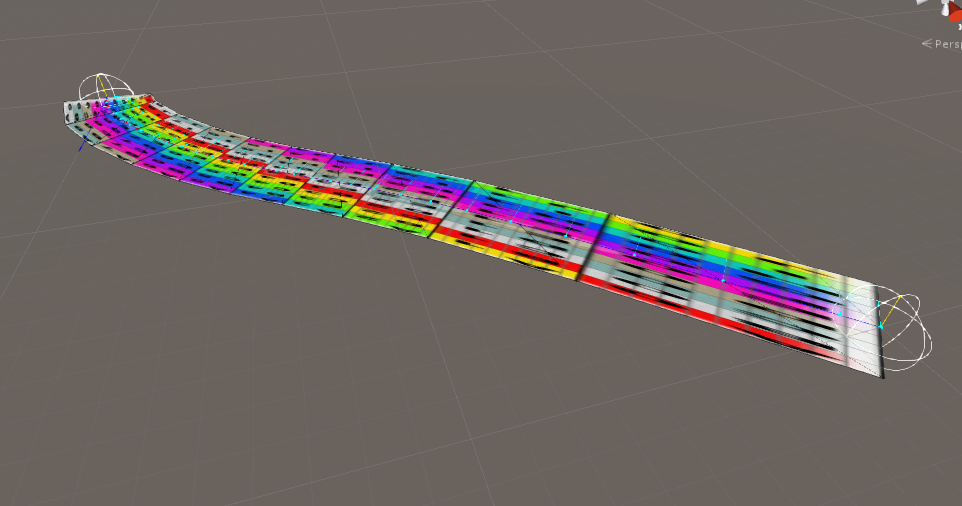
A secondary problem is multi-cell biome interpolation, which is needed for the skybox. This is necessary when you move around between cells, and you want the interpolated states to smoothly blend. So if I’m in cell A, and it’s 50% biome 1 and 50% biome 2, and I move to cell B, which is 50% biome 2 and 50% biome 3, I want the skybox to smoothly transition between the two different states. As I move further out of cell A, biome 1 has to drop down to 0%, and biome 3 has to rise up to 50%, while biome 2 stays level. Luckily this is pretty much a solved problem – it’s called bilinear interpolation, and images do it all the time. We can get the four closest known points, which are the four closest biome cell centers, and figure out how much each one of these cells affect us depending on distance. You can see a rough visualisation of this below.

capture

So, next up is working through all the structural changes Spencer is putting in, and trying to get everything combined into one point which I can then branch off again. Lot’s of things in the works!

Mils

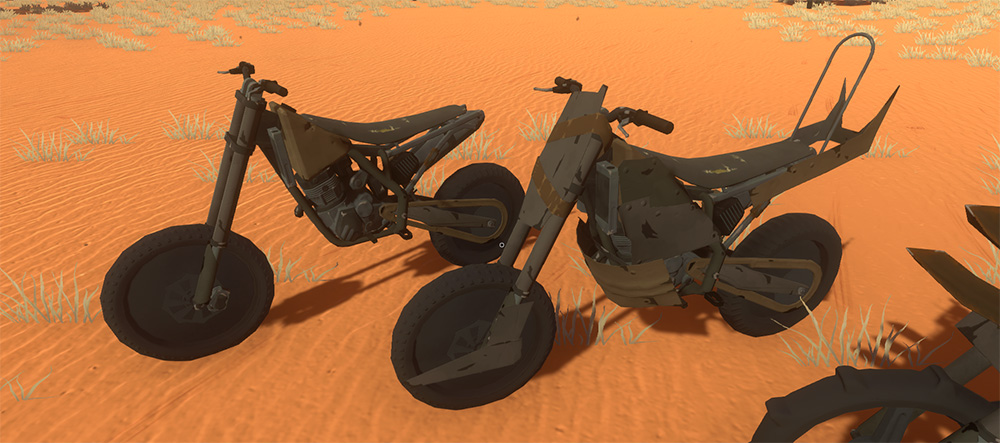
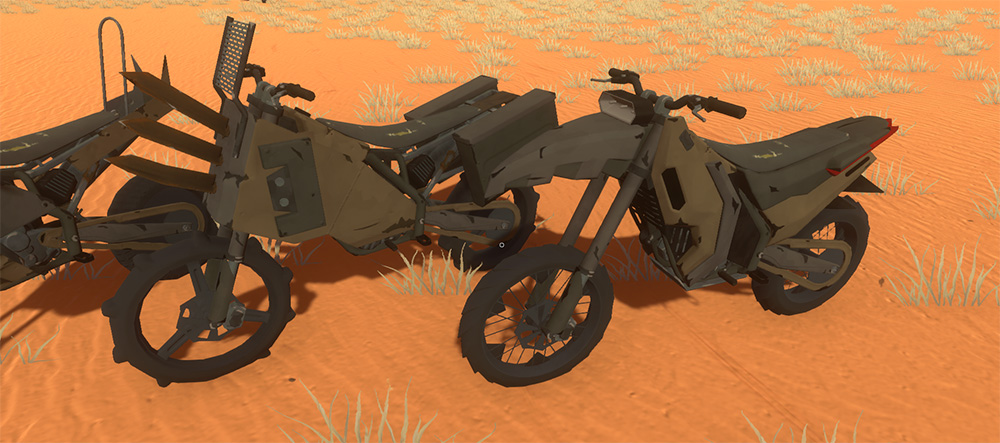
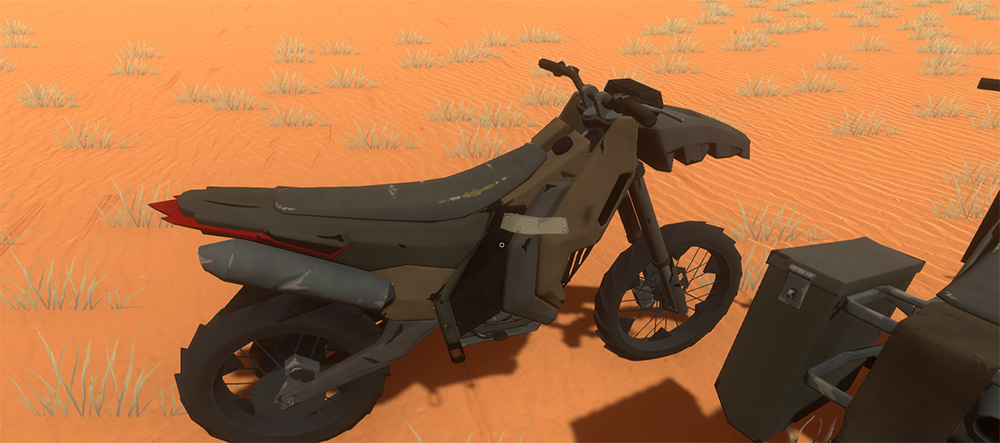
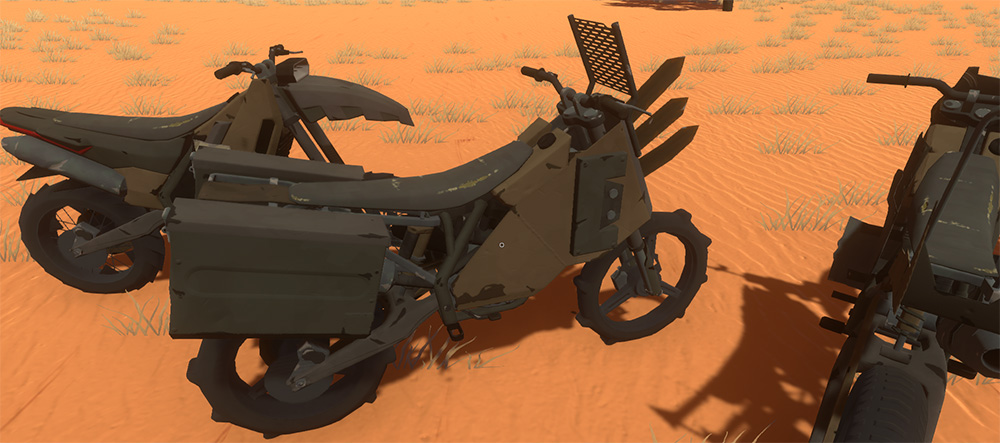
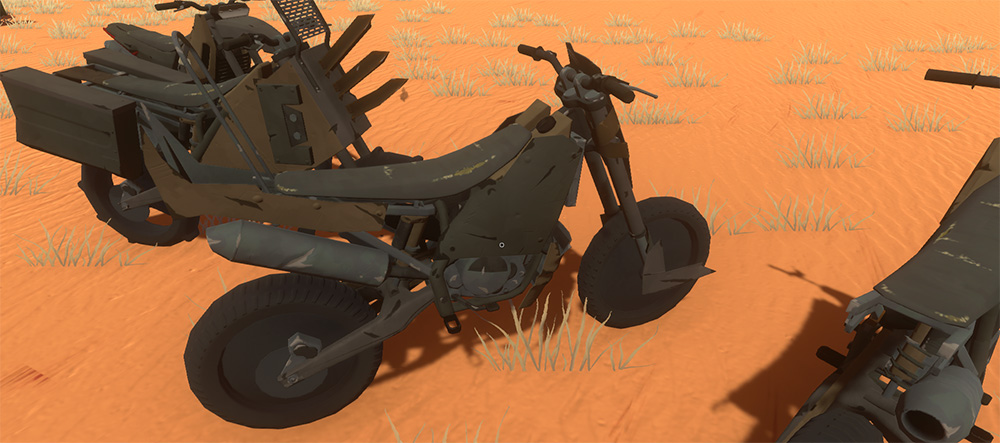
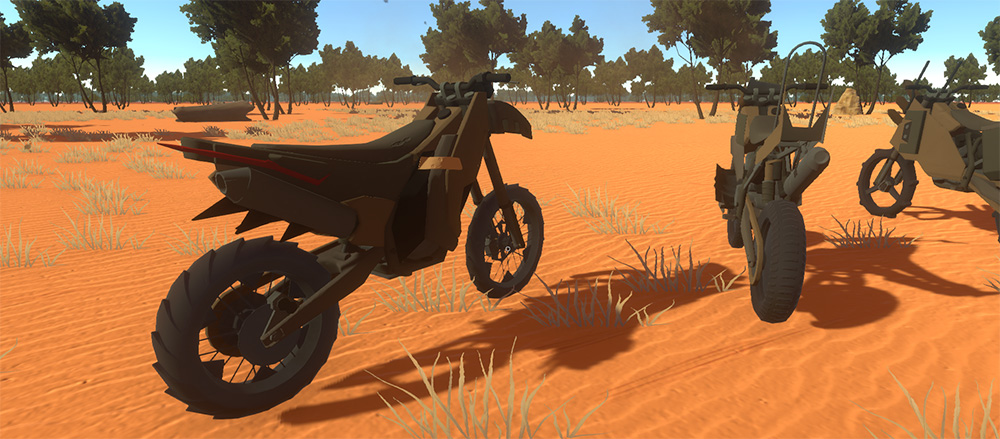
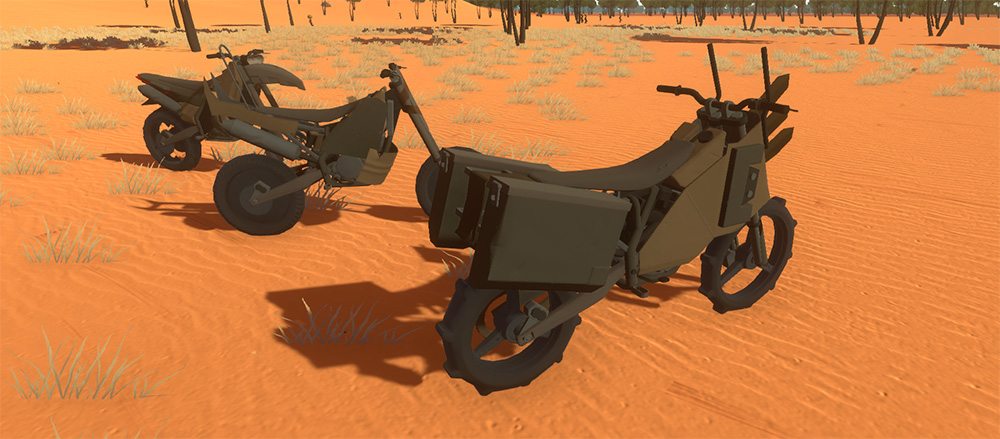
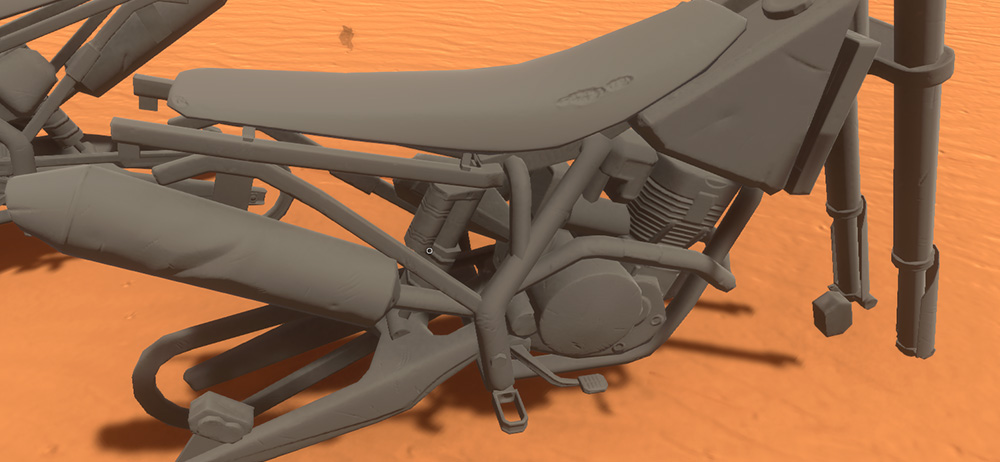
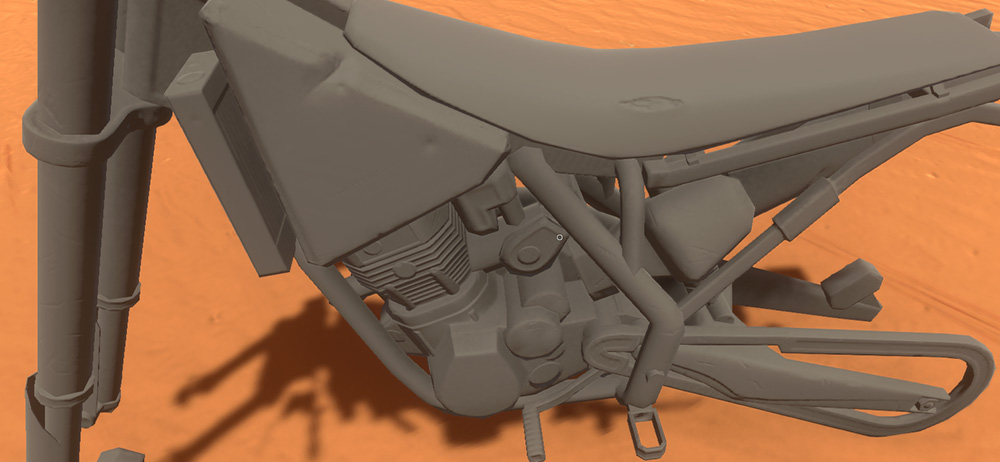
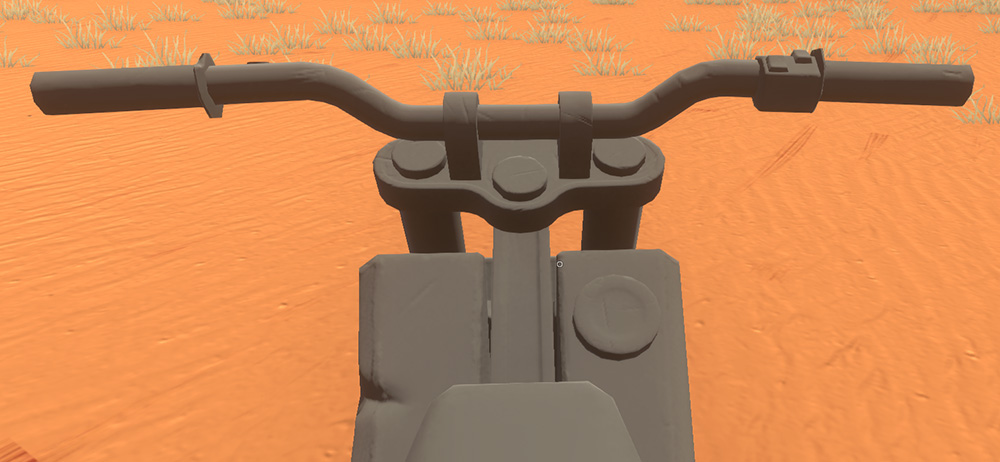
I have allllllmost finished the base texture for the Kanga this week. I have to texture the wheels, which will be fairly quick, then I have to bake the Ambient Occlusion map and generate the Specular/PBR maps from the Albedo map. The time consuming part of the texturing is done though. I will probably spend Monday finishing off the base texture and then dive into making some sweet decal designs for the body areas. These will be yet another set of designs that are completely different from the Roach and the Goat. I have a couple of ideas already which I want to try out, so I can get stuck into it straight away.

texturingalmostdone_0007 texturingalmostdone_0006 texturingalmostdone_0005 texturingalmostdone_0004 texturingalmostdone_0003 texturingalmostdone_0002 texturingalmostdone_0008

Tom

This week I’ve been working on itemv2 again getting the mesh baking system integrated and working for players. I started out rewriting our static mesh attachment class which we are using for the majority of equippable items. My first pass at the class made too many assumptions like limiting attachment points to only 1 attachment and providing no method to bake static attachments together. If we’re going to be able to deliver on interesting randomly rolled loot we need a way to stitch different stocks, barrels, receivers, sights etc together and if we can bake them all together we can reduce draw calls to 1 per item rather than 1 per part (note: in practice many shaders need more than 1 pass and guns generally need to be separated into different animated parts, ie. the magazine needs to be separate from the receiver so they can be separated during reload but even without getting down to 1 call per item there are still savings to be made).

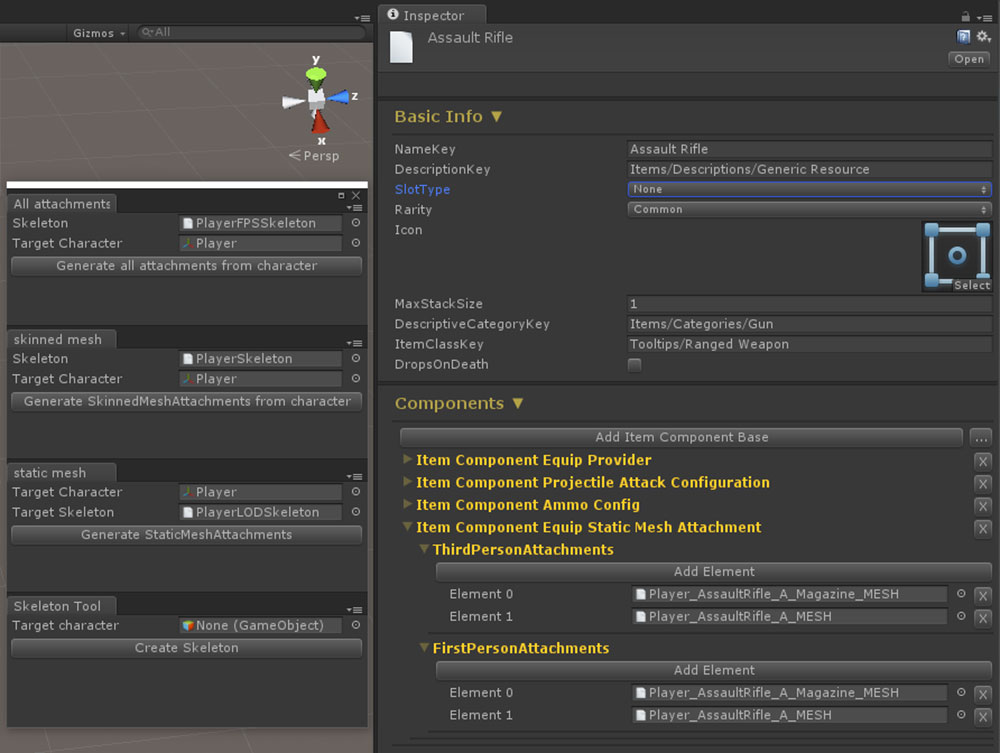
After getting statics working together I worked on an overhaul of the mesh attachment tools, used to convert mesh assets from Unity’s definition into ours. We’ve tried to make the tools as easy to use as possible, for skinned meshes as long as the mesh is bound to the same skeleton it will automatically transform the mesh into character space at the original reference pose meaning you can create assets from any reference pose as long as the skeleton is the same. For static meshes the tool automatically finds the attachment bone by recursively searching up the transform hierarchy from the mesh until it finds a matching reference from the skeleton definition, it then generates a transformation matrix to shift the verts so they are defined relative to the bone, allowing them to be placed directly on the bone, freeing up their current game object.
Both static and skinned meshes are generated by selecting a skeleton and a target character and hitting the generate button, the tool then walks down the hierarchy finding all static/skinned/both meshes and attempts to convert them all at once whilst logging feedback into the console. The workflow we envision is setting up a character within a Unity scene, positioning all the attachments correctly then selecting the root character gameobject and clicking the generate all attachments button. Then the mesh attachment assets generated can be assigned as item components inside the new item system.

meshtoolspreview

Now the mesh baking system is properly integrated into the itemv2 branch, you can see it in action here putting together a few smg configurations together on the fly:

Work on the Kanga is still going and we tested a new build at the end of the week which has given me a new list of changes to address for this coming week. Mils is getting very close to finishing up all the textures so then we just need to sort the final crash animations + testing testing testing.

Spencer

Nothing exciting this week as I’ve been working on backend and infrastructure stuff. For the first half of the week I’ve been tackling one of the last outstanding items on ItemV2 and integrating it with map creation, mod loading and our general architecture. This system manages the concept of referencing something that you may or may not have in your project.

The reason we need to do some lifting around this area is to make it so content creation in future wont be a nightmare of things pointing to eachother by names, names conflicting, the wrong assets being loaded and items having multiple versions running on the same server (like 2 wood log versions that don’t stack)

The main challenge here is we need to be able to select things in our mods (or default hurtworld packages) that are contained in something else. When a map selects that it wants to spawn a coal rock, it needs to select which networked prefab instance it is referring to. As the map doesn’t include a copy of the coal prefab, it needs to go find the correct one at runtime that may have been loaded as part of the default assets, or by another mod. There may even be a mod that overrides the default coal rock prefab that we want daemons land to spawn without having to change the map.

Another scenario is, someone creates a mod called “Awesome Resources 5.0” which contains all sorts of new metals, rocks and materials, including ways to obtain them. You would like to create a new weapon that is crafted out of Awesome Resources, but don’t actually have their source files to pick from inside Unity.

This is where the new HurtDB comes in, which allows you to pick any mod or default content pack and add its “Asset Manifest” into your project. What this does is extracts a list of all things inside a mod package that should be referncable like Items, construction prefabs, networked entities, vehicles, resource nodes, recipes, creatures etc, and adds a dummy copy of them to your local project.

This allows you to use the native unity editor to select references to objects that you didn’t create (that are backed by a 128 byte guid) that can be resolved once the mod loads in the game client.

selectitem

This also solves a few nasty issues we have had on our radar around server owners wanting to load mods after a save game has been created, making it so every asset that is ever loaded from a mod, can be properly identified and versioned to ensure savegames never break because a mod created did something dumb.

Git Pain

The second half of the week was wasted punching on with git providers to find a place to put our 50gb of asset files. BitBucket let us get away with our git repo growing to a massive size on one repository, however when I tried to migrate most of the assets to the map sdk repo it cracked the sads saying 1gb was the maximum for a repository. Interesting considering our main repo is 38gb compressed.

After a lot of research, I discovered a new extension to git that game developers have been waiting for forever! Git LFS

Anyone who has developed games using git would know that it just doesn’t handle large binary files very well. The usual alternative is to run all large assets in a different system like Perforce. Since perforce is a horribly bloated piece of crap, we do our best to minimize its usage.

Fortunately in the last year or so, bitbucket and github teamed up to build Git-LFS, a solution to git handling large files well. If you are a dev and haven’t checked this out, do yourself a favor. Instead of storing the files inside git, it stores a SHA hash and deferes to a supported large file storage system. When you fetch from a remote, instead of downloading every version of that 50mb texture your artist has ever committed, you fetch only the revision you checkout into your working copy.

What I needed to do now was go through our entire repo history and remove all storage of large files and replace them with Git lfs links. If you ever need to shirk a git repo, this utility is an absolute life saver: BFG Git Repo Cleaner

BitBucket still doesn’t allow hosted repos larger than 2gb, so I tried to move over to a paid github account. I attempted the upload over the weekend and found that it took so long, the files had expired by the time the last one finished… We needed a better solution.

That’s where BitBucket Server saved the day. I grabbed an old machine, installed a fresh copy of windows, and deployed our own custom installation of BitBucket, all in a few hours. This allows us to continue to use their awesome infrastructure, but hosted on our premises and without size restrictions.

Good to go now, but 3 days wasted. Back to moving all our assets into the default package mod structure this week.
HurtWorld Update #47

Spencer

Finally finished a first pass on the recoil system this week and I’m really happy with the results. I experimented with a few different techniques to get to where I wanted, taking inspiration from CS, Battlefield and Insurgency.

The first challenge with the system was to ensure despite the randomness of the recoil patterns, that both the server and client could independently reproduce the same randomness for client side prediction of bullets. The solution I came up with was to seed every frame where random recoil data was needed with the entity time of the player (something that both server and client will always agree upon). Typically pseudo random functions don’t give a particularly even distribution when re-seeded every frame with linearly changing seeds (time always ticks up by one) so instead I created a long buffer of a random bytes of data using Random.Next() which I can use as seekable random lookup later. This also ensures the performance of the random function is as good as it can get.

On the first pass, I used a lookup table for each consecutive bullet fired and increased the recoil to that specific point after each bullet. The reason using a lookup instead of complete randomness, is to give players the ability to get muscle memory for the recoil patterns, creating a higher skill ceiling for gunplay. While this method had the desired muscle memory effect, it didn’t feel enough like a powerful kickback. The animation side / feel of the gun was a bit lacking, it also made it hard to evenly interpolate out of the recoil position without deviating from the pre-determined path. In other words the fallback looked like inverse recoil.

My second approach was to use a lot more randomness. I replaced the method driving the recoil from being a pre-defined path, to using a spring and applying random forces to it. This had a bit more of a recoil like feel, but took away most muscle memory effects, and was very hard to tune over a long period of spray.

The thing I found was if the recoil was strong enough to make you inaccurate on its own while still firing where your crosshair is, it felt too intense. I decided to introduce a layer of inaccuracy over the recoil pattern that increases over time. This way I can keep both effects fairly subtle, but combined they give a decent effect on your ability to hit a target without feeling crazy.

I also replaced the random spring kick with a bullet index lookup based on shots fired in spray which brought back the muscle memory nicely. However there was still a lack of kickback feeling on the gun. I narrowed it down to the fact that, while your game is usually animating at ~60+ fps, the equipment is simulated at 20fps. The render thread interpolates between equip simulation ticks to ensure motion continuity, however this smooths out the initial spike from the recoil kick taking away a lot of its punch. What I did to solve this was to add a second much tighter spring that runs on the render thread, and applies a consistent kick with is likely only visible for a frame or two but layers over the top of the 20hz spring to give it a bit more heart.

The result at this point looks like this:
Note muzzleflash and gunsmoke are currently disabled, they will be added back in later

You’ll notice that I drive the inaccuracy (not recoil) curve of a few different factors:

  • How long you’ve been spraying for
  • If you are sighted
  • How fast you are moving
  • If you’re crouching
  • If you are grounded

While this system is deterministic, and can be easily controlled if you know whats happening, the old crosshair had a massive lack of feedback. So I built a new one that shows you exactly whats going on:


I am in the process of getting the ItemV2 branch back into a playable state now, once that is complete we will be doing some deathmatch testing with the AR, iterating a bit then we play to release a gunplay preview branch to get your guys feedback. There is still a heap to do on gunplay like sound, impact feedback like better tracers, blood impacts and sounds. We will be iterative on these over the coming weeks.

Cow_Trix

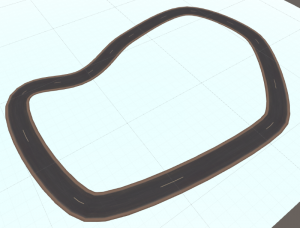
Been smashing out a new road tool this week, and I’ve made some substantial progress. Warning! This section is probably not going to be super interesting for people who aren’t making a road tool themselves, or don’t have an interest in programming and mathematics. For those two categories of people though, I hope that this may be valuable for your own solutions to this problem. So, how do we build a procedural road network in a flexible, extensible, reliable way?

Roads1

A simple mesh distorted along a series of splines

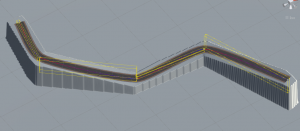
I boiled the whole concept down from roads and intersections and all that stuff to a much more abstracted model of a managed network of nodes. All a node is is a position in space, and connections to other nodes. A node by itself is not particularly important in isolation, as it’s the connections that will make up our roads after all. The first thing I did was set up this basic structure, of the network owning the nodes, the nodes owning connections to other nodes, and then the connections owning components that would do things to create the road in the world. So, for instance, the thing that is responsible for warping a mesh along the connection is a component, as is the thing responsible for changing the height of the terrain under the road to match it. As we want our roads to curve smoothly between nodes, we need to interpolate between them. The usual solution, and the path I went down, was quadratic bezier splines, which have some convenient properties. This page is a must-read resource for the algorithms behind this part of the system.

So, the next step was warping a mesh along this spline. This is the first connection-component I wrote. The easiest way to do this is to envision one axis of the mesh as being the special spline-axis. What you then do is iterate through the vertexes, translate the mesh vertex position from this straight axis to the warped spline axis (using the bounds of the mesh as your normalization – after all, the spline t value must be between 0 and 1!), and there you go! Some road tools use a different methodology where they procedurally generate the mesh as they march along the spline, but to be honest it doesn’t seem worth the time and effort for me, and there’s just a million more places where things could go wrong. It’s an editor tool after all – if it can be done better in a different program, like a 3D modelling tool, it should be done there! Using our methodology means we can distort arbitrarily complex meshes as roads without increasing the complexity of the code. The caveats for this methodology is that we need to implement tiling in our input models (although really we would have to do this with the other methodology as well), and that we need to do a final UV pass to “undistort” the UVs. This UV pass is necessary due to one of the properties of bezier splines – that the “natural time”, the value we feed the bezier algorithm doesn’t correlate with the distance we’ve traveled along the spline. So we cannot assume that a base mesh with evenly spaced verts will result in a warped mesh with evenly spaced verts, even if we’re distorting it along a completely straight spline. So, we have to re-UV.

RoadSmoothingAttemp1

Eesh! A naive spline-marching implementation of setting the terrain heights

The second challenge has been to make the underlying terrains come up to meet the road in a way that doesn’t result in significant clipping. I first tried a naive method of just marching along a spline, and drawing a line along the spline on the heightmap as I went. Unfortunately this didn’t work particularly well – even on completely flat roads, as shown to the right. When we transition from one spline to the next, we get significant tearing. It is also slow to calculate, and when you change the heights of nodes to something extreme, you get significant stepping depending on the order you march through the splines, so I changed tactic.

The second methodology I used was to take the bounds of the spline, and iterate through every heightmap point in that bounds. For every point on the heightmap, the question is – what is the closest point on the spline? If we can find the closest point on the spline, and set the height at this point on the heightmap to the height at that point, then we’ll get a nice, smooth and well fitting curve on the heightmap that will fit exactly under the road. Unfortunately, due to the whole thing with no non-integrated solution to correlating natural time with real distance through a spline, there’s no exact solution to this. We just have to find a decent approximate solution. I found some resources on this problem, but I’m the kind of programmer to just jump into a problem and try and solve it from the basics. A simple solution that I figured would work in all practicable solutions, where we weren’t doing crazy distorted splines, was just a binary search. The binary search is structured like so: start with an arbitrary point in space, p. take a segment (beginning with [0, 1]) and split it in half, so you have three points along the spline, p0, p1, and p2. Calculate the distance between and all of these points. Now, compare the combined distances of p0 + p1, and p1+p2. Based on these results, we change the range we’re looking at on the spline and repeat the procedure, until some threshold of the accuracy of is reached. The advantage is that the amount of iterations the algorithms requires is constant, depending on the accuracy threshold required. This works pretty well, and you can see a gif of the algorithm here:

CullStep1

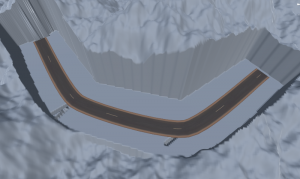
So, now we have the closest point, it’s trivial to figure out what height a certain point in the terrain needs to be. From this poin, all I needed to do was blend the height we calculated with the road height, based on some falloff. However, this was still a little slow, so I put in the ability to get a spline’s object bounding box, so we can cull a large amount of height calculations for roads that aren’t orthogonal to the terrain heightmap grid. This sped up the calculation speed a lot. Throw in a blend with the original terrain, and this is the end result:

TerrainCutting

I’m pretty happy with this result! Next steps are implementing the UV mapping, and tiling meshes along a spline to allow for better poly concentrations on hard bends. More on this next week!

Gavku

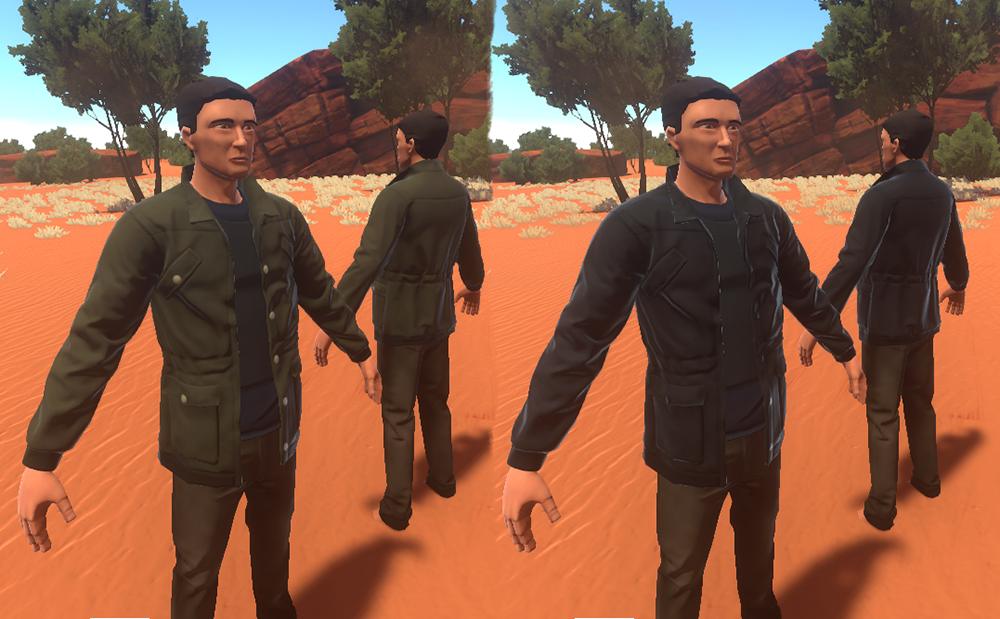
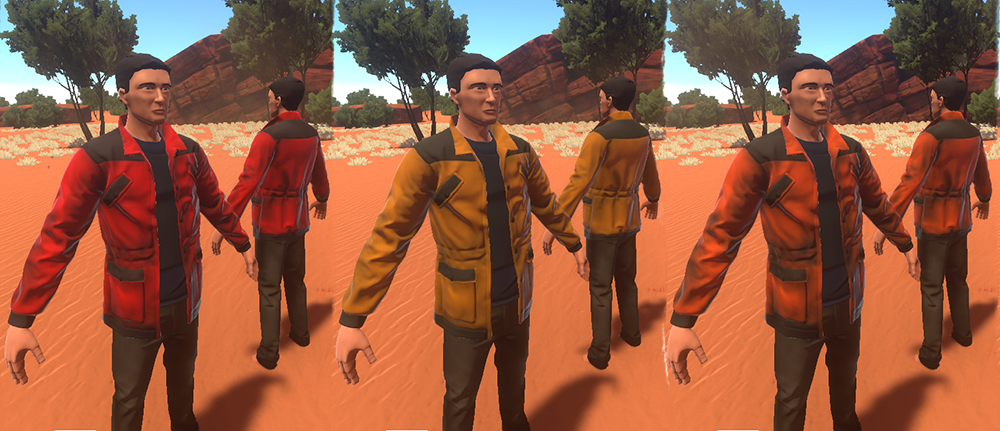
This week I have finished of a version of the jacket and done a few texture varieties for it. Its been made in such a way that you will be able to view gear you have equipped underneath it, ie a tshirt or combat vest that your character may be wearing.

JacketUrban

JacketRescue

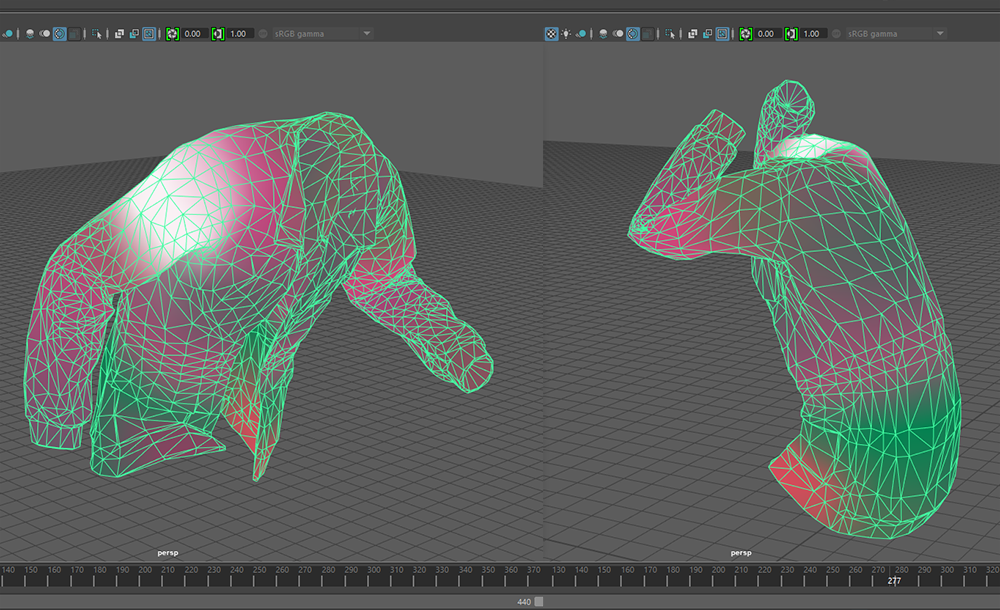
This also involved tweaking and skinning to make sure there wasn’t an egregious amount of clipping with the gear underneath. To do this I bring a new mesh into a maya skinning file that has the player skeleton and base meshes loaded, as well as some test anims of his movement. I then copy skin weight of the player across and start testing the deformation, tweaking parts of the skin data until its at an acceptable point.

JacketSkin

Mils


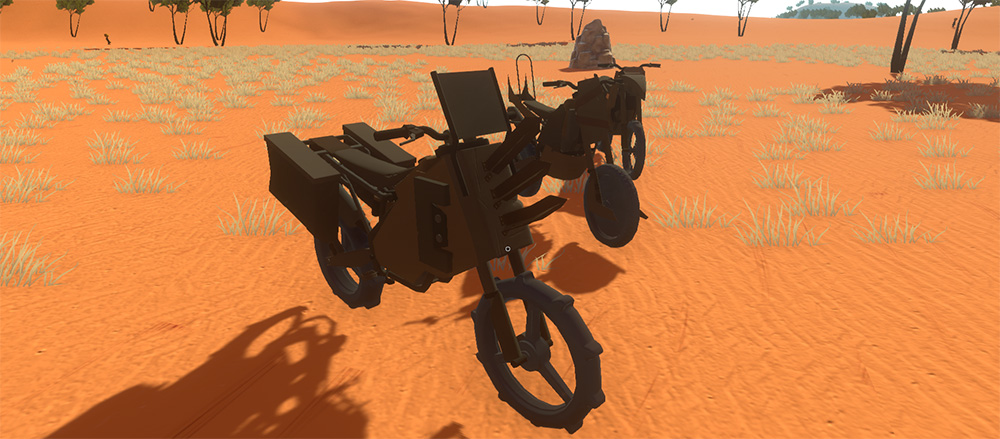
I made it to texture town this week. So I just did a little flat colour testing across the meshes. It’s looking really nice, all the normal maps came out well. I gave Tom the mesh and textures to make some gifs. Next week I’ll be adding some extra bits to the normal map and then moving onto the base texture details. After that I’ll design the graphics for the body kits and then I’ll be done.

Texturing_0004_Layer 1 Texturing_0003_Layer 2 Texturing_0002_Layer 3 Texturing_0001_Layer 4 Texturing_0000_Layer 5

Tom

I started this week working on validation for the crash system, adding checks to make sure you can’t use crashing to glitch through bases and terrain.
The crash system works by putting the player inside an invisible vehicle they have no control over and letting them tumble around until they come to a stop, then they get out. There are two opportunities for glitching, spawning the crash vehicle and leaving it after the crash.
Whilst it is easy enough to do various combinations of raycasts and overlap checks to check the new positions are clear, it is tricky to decide what should be done if these checks fail. For instance we perform similar checks currently when exiting vehicles to prevent players exiting through a wall into someones base, if the all the vehicle exits fail this check we prevent the player from leaving the car. Unfortunately this isn’t a good solution for the crash vehicle as you’d find yourself stuck forever if you come to a stop in an invalid location. Another option could be to kill the player but we felt this would be far too frustrating for players.
What we’re going to try is putting the player into a crawl mode after a post-crash validation fail which will allow the player to control their crash vehicle with physics forces until they push themselves into a location where it’s clear for them to stand up.
For spawning the crash vehicle we perform a capsule cast from the motorbike location to the desired spawn point, if this fails we spawn the crash vehicle directly on top of the motorbike instead.

Also this week I’ve been working on balancing vehicle damage. Just having an overall vehicle health felt a bit simplistic and led to vehicles either feeling like bullet sponges or being unrealistically weak so I’ve made the vehicle attachments a bigger part of the picture.
Technically currently on live all the attachments have their own health and can be individually destroyed in the same way you can remove wheels by shooting them off it’s just that all items but the wheels have huge damage reduction on them making it impractical and wasteful to remove them in this way.
I’ve rebalanced all these modifiers effectively reducing their health to reasonable levels and changed their behaviour so projectiles will no longer penetrate through vehicles like they do to players and made it so damage received by a vehicle attachment will not transfer through to damage on the vehicle.
This allows us to have reasonable levels of vehicle health without them feeling too weak and we can create more interesting attachments to drive decisions like, ‘do I use the heavy but strong armor panels or the lighter, faster but weaker panels?’.
It also allows us to do cool things like if you shoot storage panels off vehicles they will drop any loot being held in the additional storage slots.

I’ve also been tweaking explosions so vehicles take extra damage leading to chain explosions and making explosives a relatively hard counter to vehicles. I also made explosions apply a brief heat effect to nearby entities which if you’re close enough can be hot enough to ignite you (or in this case, the vehicle corpses left behind).

I’ve also been working getting Mils latest art into the game and setting up the paint slots and masks, its really starting to come together!

As for what’s left to do before you can get your hands on it:

  • Replace placeholder crash and get up animations and create crawling animations
  • Get final textures for the Kanga including the paint mask patterns
  • Settle on the final Kanga itemsets
  • Rework vehicle spawns and loot tables to include the Kanga
  • Testing (especially balance and crash validation)

Hurtworld Update #46

Cow_Trix

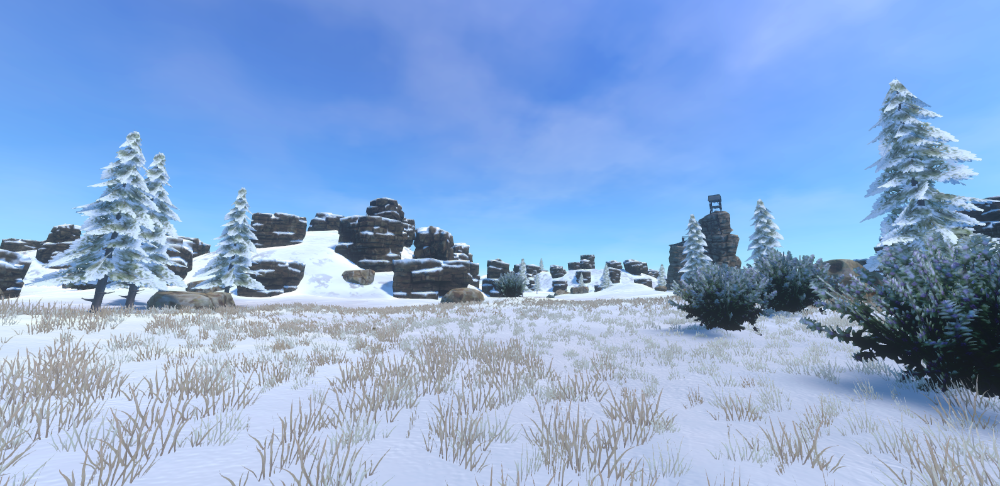
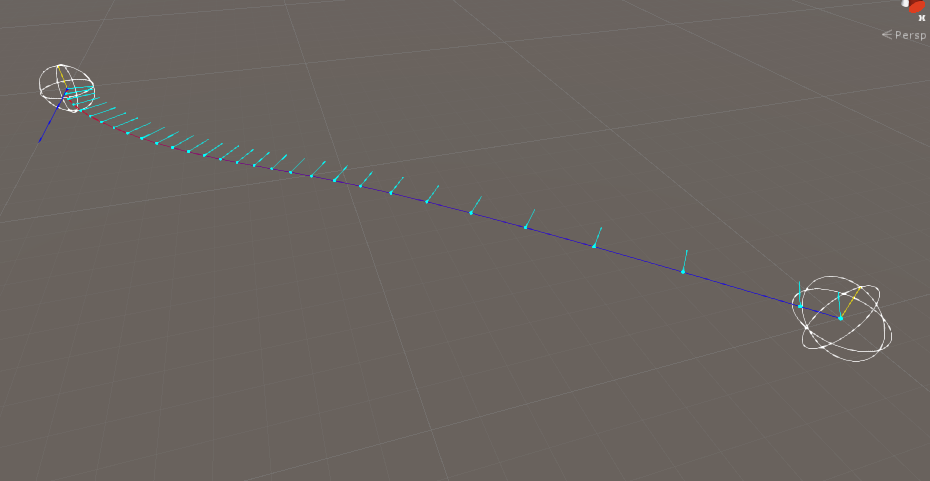
So a lot of progress with the map and the tools we’re using to make this map awesome this week. The biggest blocker right now is waiting for some new features, such as biomes, to come out in MapMagic. Biomes in this context means being able to blend between completely different generation rules between areas, that should allow us to really start creating the macro of the map, so I’ve been playing around with some of the other existing assets and making some other biomes. I also completed working entity spawns into the MapMagic system, so now we can procedurally place spawns based on some basic rules. This should hopefully speed up that element of map creation.
SnowBiome

Another big thing has been roads. Previously we used a 3rd party plugin called EasyRoads. The roads in Diemensland were made with this plugin, and it was ok, but has some significant issues and is definitely a work-in-progress. As well as struggling with some tasks, it’s also obfuscated and compiled into a DLL, making it impractical to fix up and extend. So, I recently started making our own road tool, which is going to be awesome! It’s a project I’ve wanted to tackle for a while now, ever since hitting the shortcomings of the available tools. We may do this for other systems that are currently mostly 3rd party, in future, such as navmesh generation and pathfinding which are currently a frankensteinian blend of custom code and 3rd party tools.

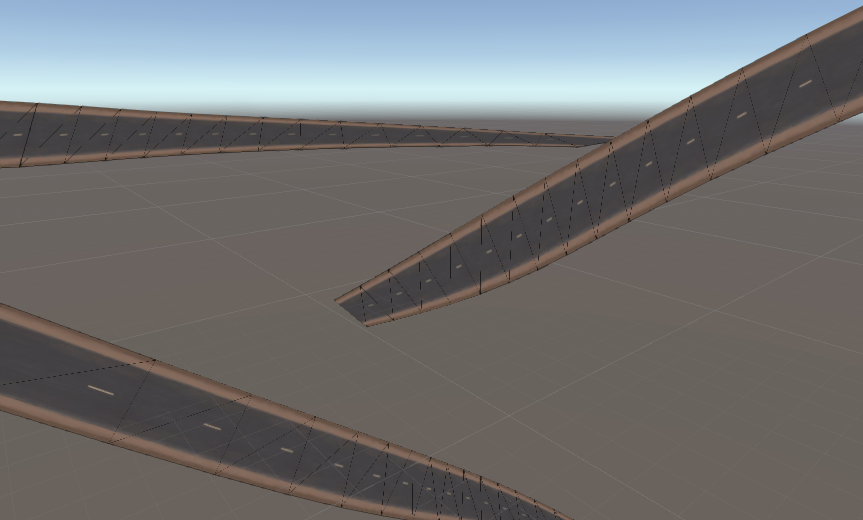
Splines3

So, I’ve started to write my own little road tool which has been a fun little trek into spline-maths, something I haven’t used since university days. But very interesting problems! I’ve got a mesh to deform to a spline, which is the main challenge. There are still a few bugs with interpolation to iron out, but it’s been surprisingly easy. Hopefully some cool new road screenshots for you all next week!splines2

splines1

Spencer

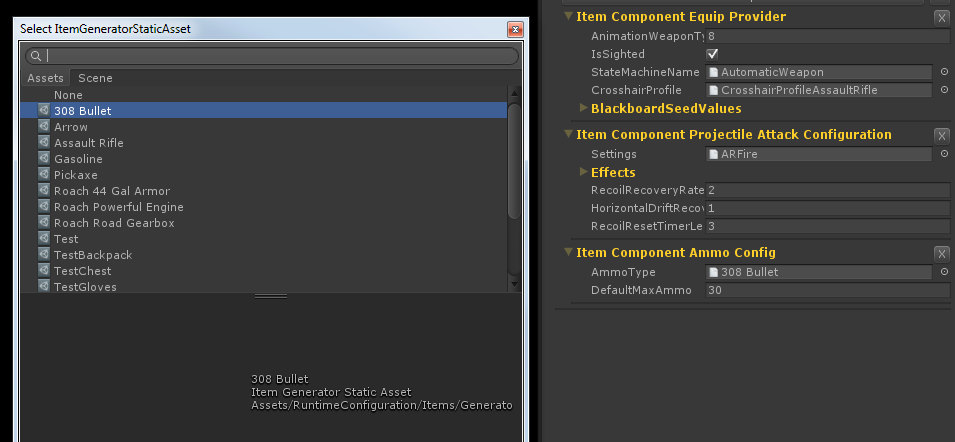
This week I’ve re-implemented the assault rifle in the new item system, giving the new ammo architecture a bashing and started testing recoil. In the process, finding and squashing heaps of bugs in the new item serialization.

As I had hoped, we now have full client side predicted equipment simulation and switching regardless of latency to server! This means at 200 ping, you can switch weapons and fire without that sluggish delay that exists currently, what you see other players doing on your screen will always match their screen, and that awkward jam where your gun won’t shoot will never happen again 🙂 This might not seem like a big deal, but this is a big step in raising the bar in survival game gunplay. Our architecture is close to on par with CS:GO, combined with some big performance gains we are working on, we should be able to deliver that top tier FPS gunplay we have always been aiming for.

Arbitrary State On Items – Removing Infamy

Something I’ve touched on before briefly, but not for a while, is the goals behind ItemV2. First and foremost, we want to get rid of infamy. Infamy was an experiment that for us patched up a simple issue: The more time you invest in your gear, the more you have to lose if you die. Full loot with extremely valuable gear doesn’t work as you get set back to square one if you die. Infamy gave people a choice, to not risk their gear unless absolutely necessary. Protecting noobs from griefing was an added bonus to the system, not the primary reason.

I wrote a large blog post on the ins and outs of the topic here: Infamy – State Of the Union

While I could have patched in some bandaid features that would have lessened the issue, I believe it would have put us at the end of our lifecycle in development. When building anything, you can only overextend yourself so far before you either need to improve the foundations or leave it as is. This is what I see in a lot of early access games, where the dodgy hacks thrown in to get something out the door make the workload for adding new features so large most just call it quits.

What we ended up doing instead over the last 6 months was some what of a “Reboot” to some large parts of our systems. Being a absolutely crucial part of our game, items are how we create value, simulate equipment, drive the economy and balance almost everything in game.

Our original system was based on items defined ahead of time that dont change at all. Eg red pickaxes were equal and we had no way of storing information against unique instances of items besides a hacky implementation of item transitions and ammo storage. Adding something like durability to an item, would require another hacky patch that all future items would need to work around. Considering we are working towards completely procedural constructed items where each instance in unique (think Borderlands) this was an impossible task. On top of this, the actual simulation of items you have equipped was a mess. While each persons client machine “predicted” the state its equipment was in, we had no way of determining if the prediction was done correctly. Resulting in the server and every other player having a different picture of what was going on than you did.

Solving the above problems were by far the most difficult engineering problems I’ve faced to date. Mostly because there is no right answer, and there isn’t really common industry knowledge of how to client side predicted high frequency simulation of complex moddable items in the scale of a persistent survival game. Nobody is doing it.

The good news is everything above is now solved in a robust architecture that also allows modders to create their own client side predicted equipment content and procedural item generators, all from the safety of our unity editor SDK. I know I have spoken about this before, but now we are reaching the point where we can start filling it with content.

Rewriting the item progression

Back to the task at hand… to remove infamy means we need to completely rethink how we store value that a player has accumulated. If we go full loot, we need a way to ensure that being killed doesn’t set you back to square one. To do this we are completely re-writing the item progression from the ground up.

Now that we have an architecture that allows us to do infinitely more with items we are really going to shake things up. More on this in the coming weeks!

Mils

I had great success with the new baking software that I mentioned last week. Handplane baked out the normals quicker, with less work and better results than the previous software I was using. It’s a great step forward for this kind of work. So the Kanga chassis normal maps are complete and I also got through all the unwrapping on the uv maps for the rest of the body kits. Now I just have to lay out the UV’s scale them to the right sizes and I can bake them out as well.

ChassisNormals_0003

I plan to be into texturing by the end of the week, and after the base texture is done I will need to design the skins that will decorate the Kanga so you can all customise colours and patterns and make the Kanga your own.

ChassisNormals_0000 ChassisNormals_0001

ChassisNormals_0002

Gavku

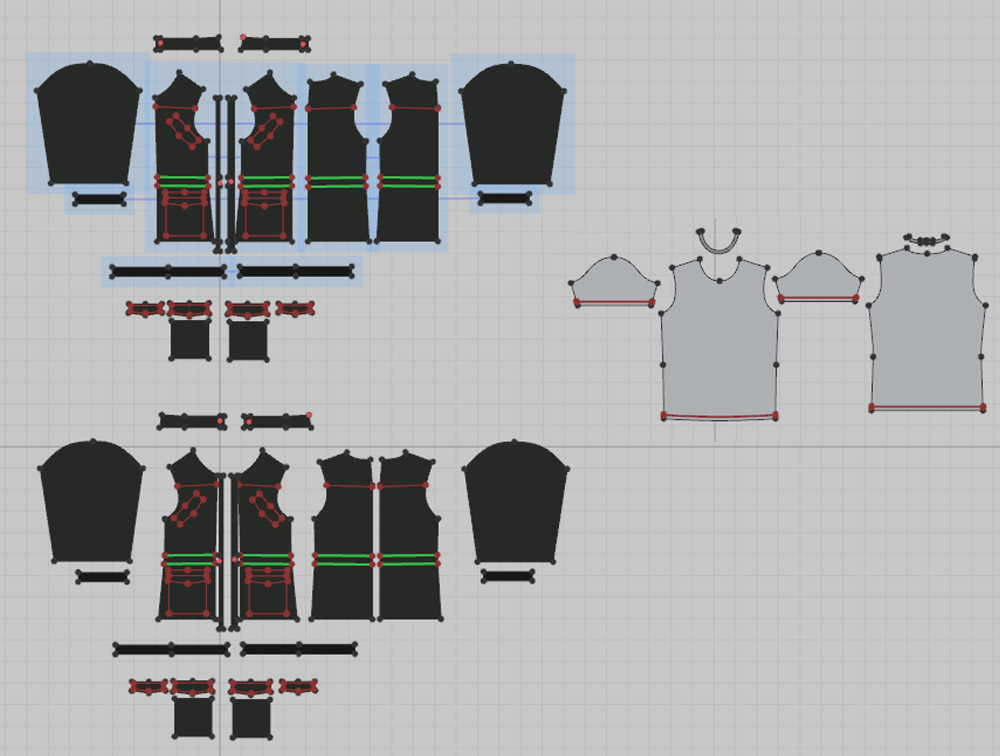
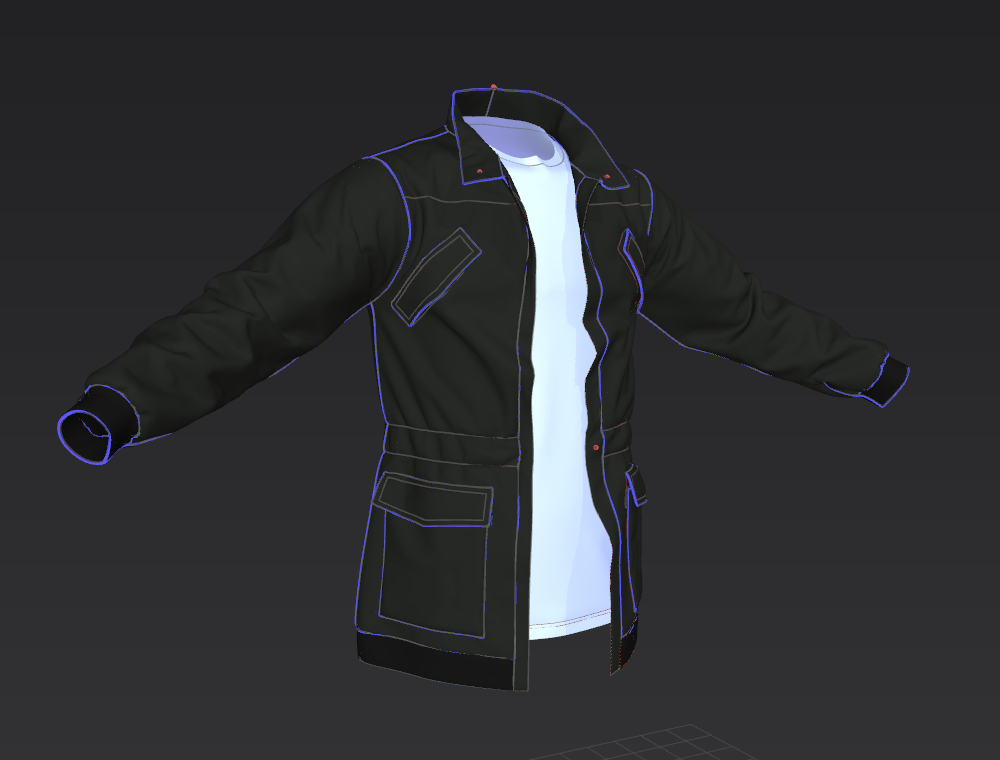
So this week I have been working on a player jacket. It involved a bunch of noodling around in Marvelous Designer especially when I was getting closer to something I liked, as it can be pretty easy to tie yourself in knots, or get in to a loop of continually pushing and pulling segments trying to get something that would sim correctly.

I placed the player tshirt underneath the garment to help give it some bulk as well as layer cloning the pattern when I was happy with it to beef it up a little.
This is an image of the pattern, and undershirt.
Pattern
Marvelous Designer 3d screengrab
JacketMARV
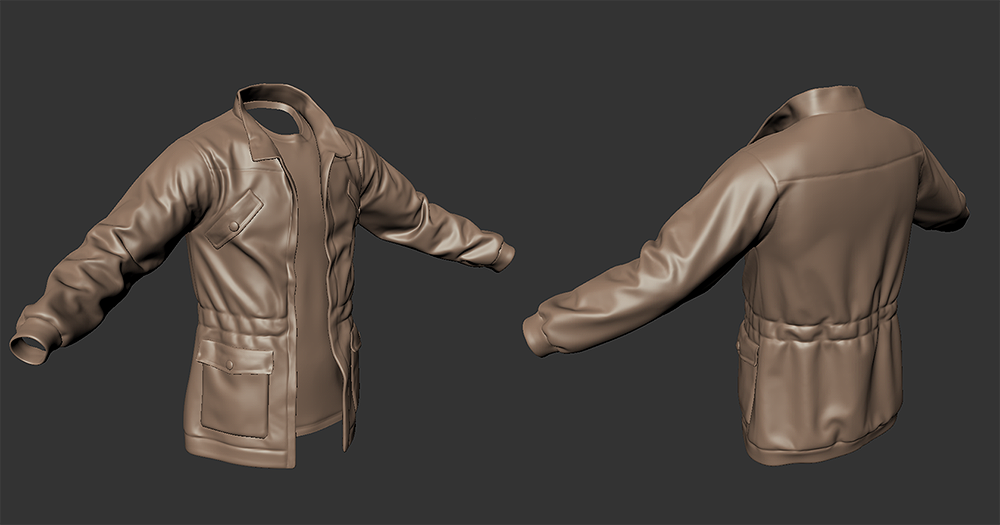
This mesh needed a bit of cleaning up in zbrush and max, mainly due to birdsnesting of verts ( a whole bunch of messy verts in one location ), as well as having to flip normals on certain segments.
I then took it in to mudbox to clean up some lines.
JacketMud
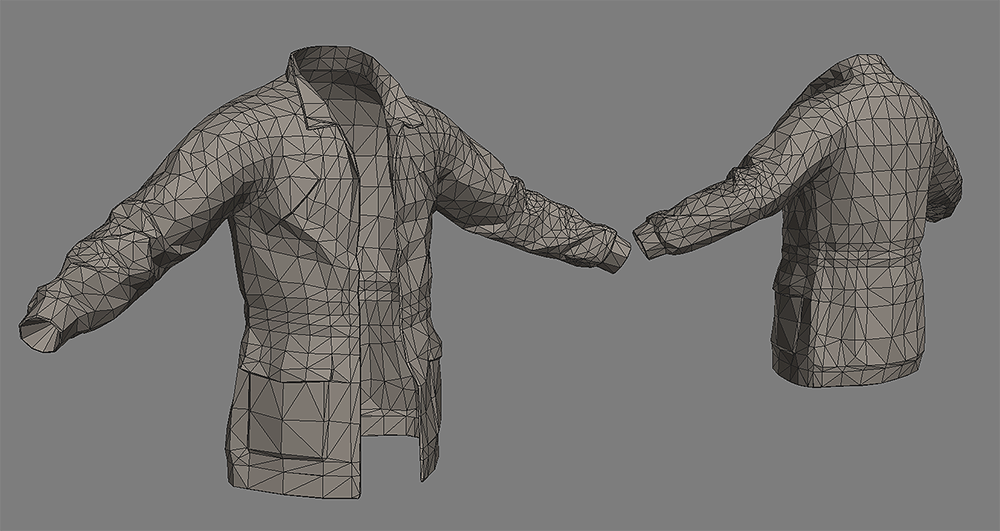
I have built and unwrapped the low, and am in the process of baking and texturing. I’ll then be test skinning it, and seeing how well it interacts with gear lying underneath ie: tshirts, vest etc.
Jacket_LOW

Tom

The Kanga draws closer! This week I’ve been working on integrating the Kanga properly into the game, creating the equippable items and ui window and setting up the paint and masking system.
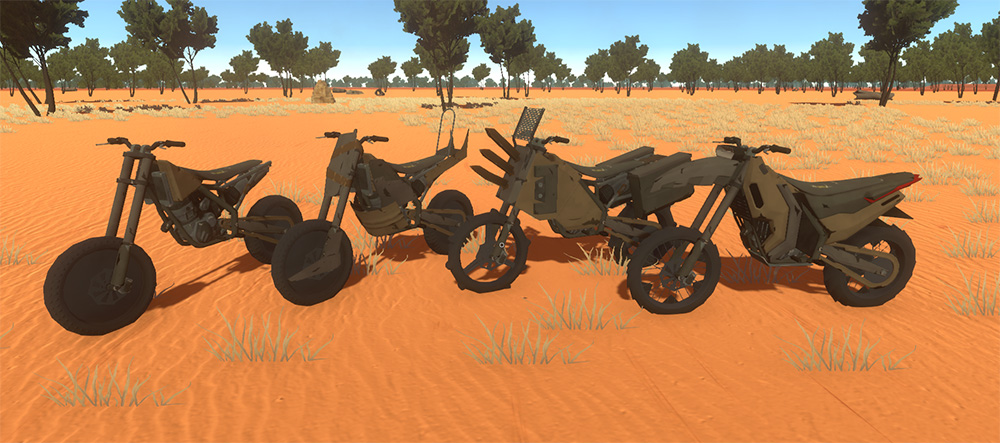
The gearboxes and engines come in the same variations as seen on the Roach and Goat at the moment (offroad/on road and damaged/weak/standard/powerful respectively). There are 3 wheel types to match the 3 panel attachment types that affect traction, weight, turn speed and fuel consumption.
The panel attachments will be split into front and back panels the same as the Goat, I’ve created some placeholder panels to add storage with the rear containers and am experimenting with adding vehicle armor through attachments.

I’ve also changed our explosion effect so it scales with explosion size. Below you can see the difference between a vehicle with no fuel and a vehicle with max fuel. The max fuel one is a bit overkill at the moment and will likely be scaled back once I dive into balancing this week.
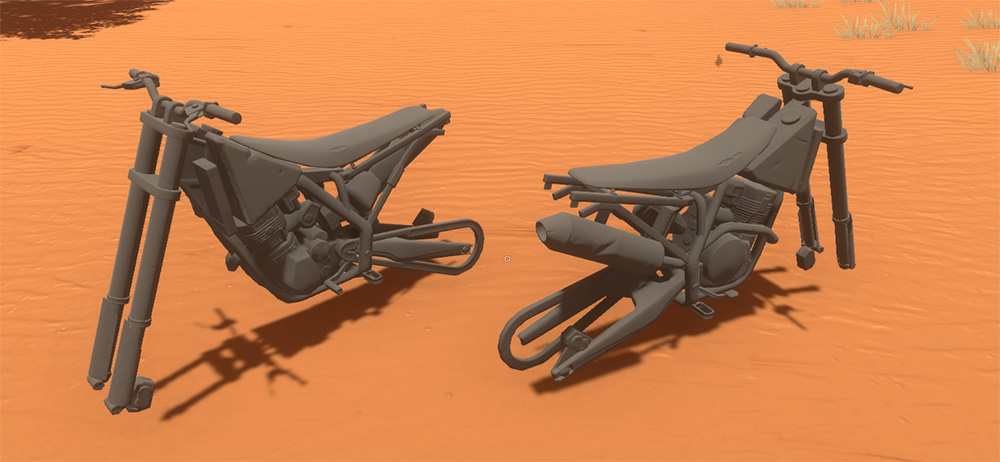
Something we want to achieve with the vehicle changes is being able to remove the claim system, vehicle auto despawns and vehicle spawn limits. The real blocker for us to achieve this at the moment is the rendering overhead, especially when you have heaps of vehicles in the same location like when you drive by the garage of that player who has been hoarding vehicles and it loads them all. To deal with this I’ve been working on a dynamic level of detail system that sorts objects by their priority and uses this sorted list to decide the level of detail the object needs to be displayed at. The system has a player chosen budget so users can make their own compromise between level of detail and performance depending on their hardware.
At the moment it’s just running on vehicles with priority based on distance and whether the vehicle is occupied (so vehicles with players in them always have a higher priority) but if it works well there we can extend it into players, constructions and other dynamic objects.
Here’s a visualization of the system working on a pile of Goats

Dev Blog