Press Kit Wiki

Hurtworld Update #75

Mils

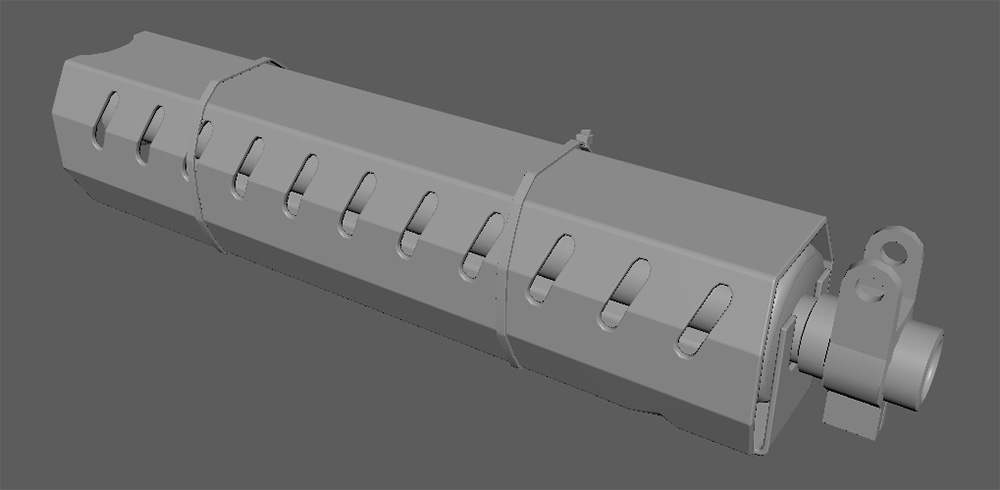
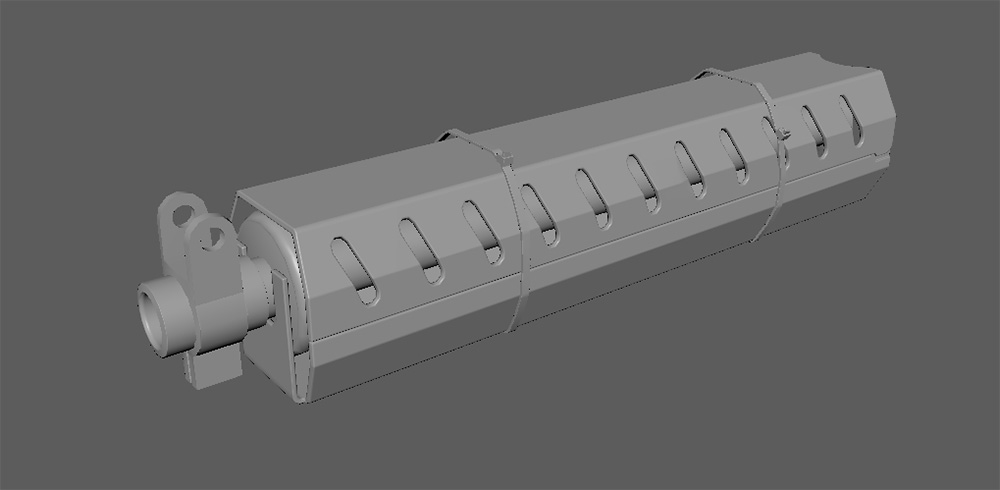
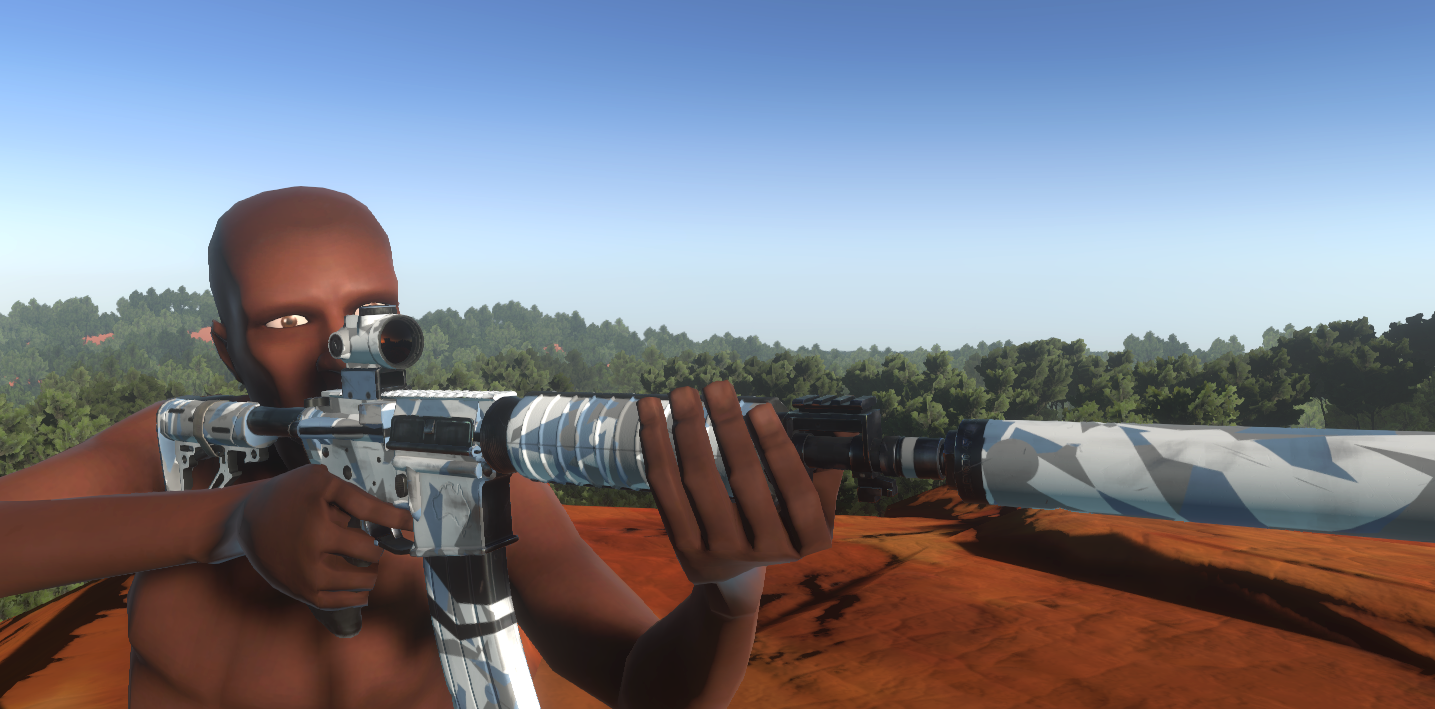
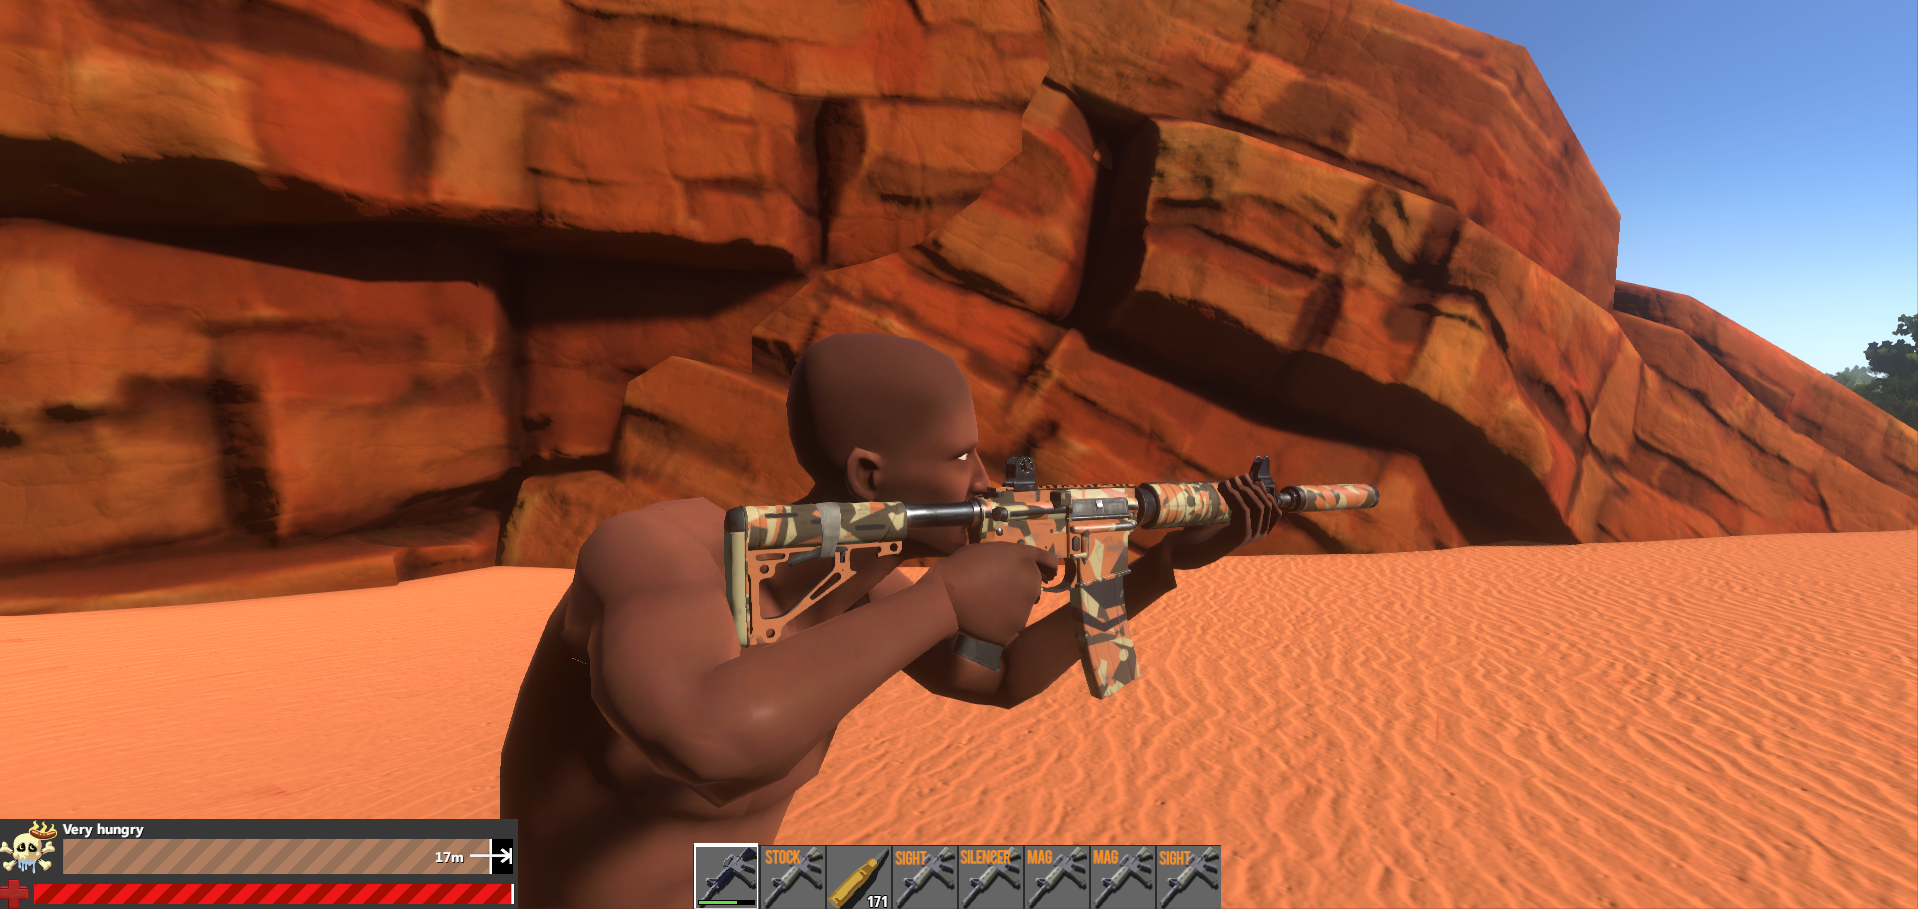
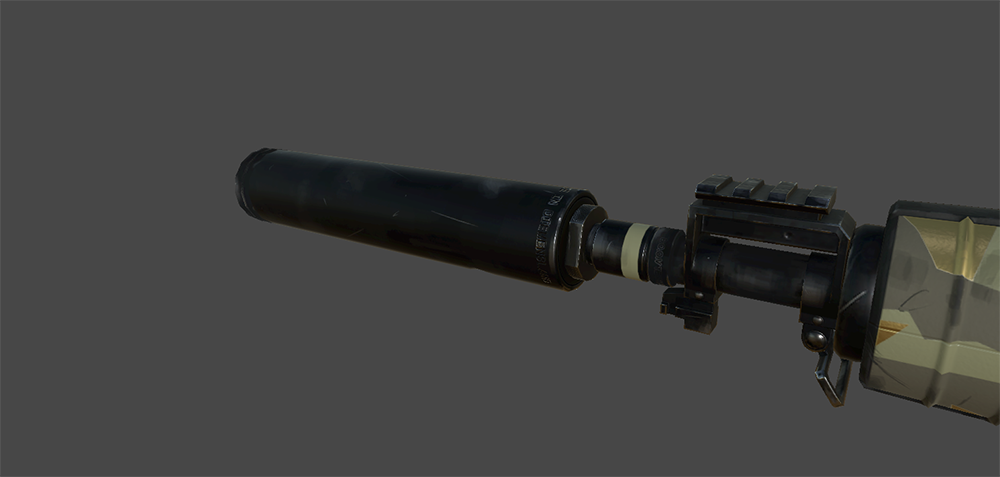
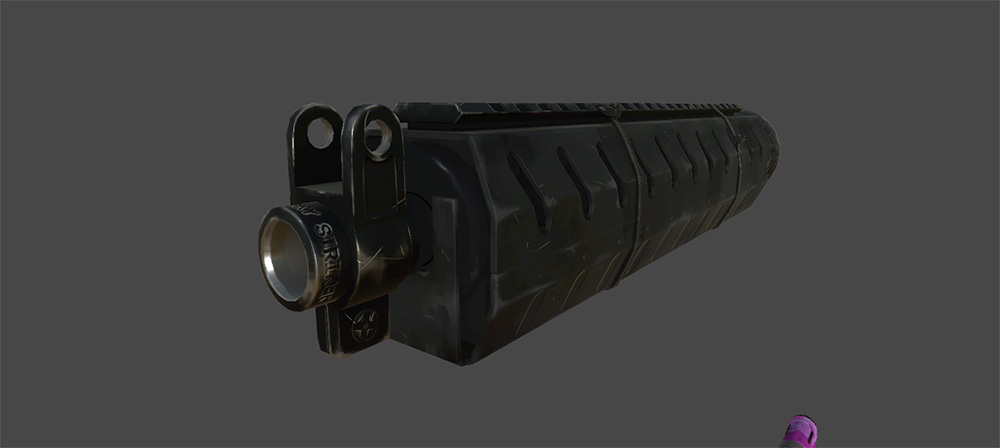
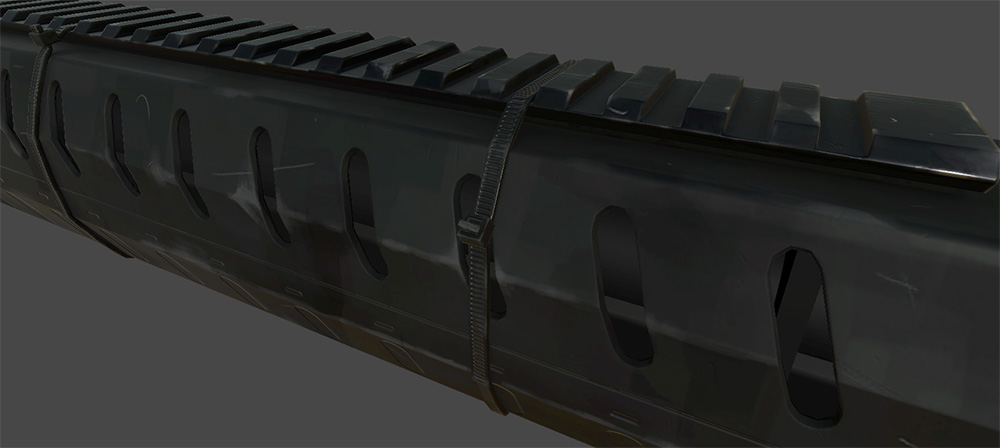
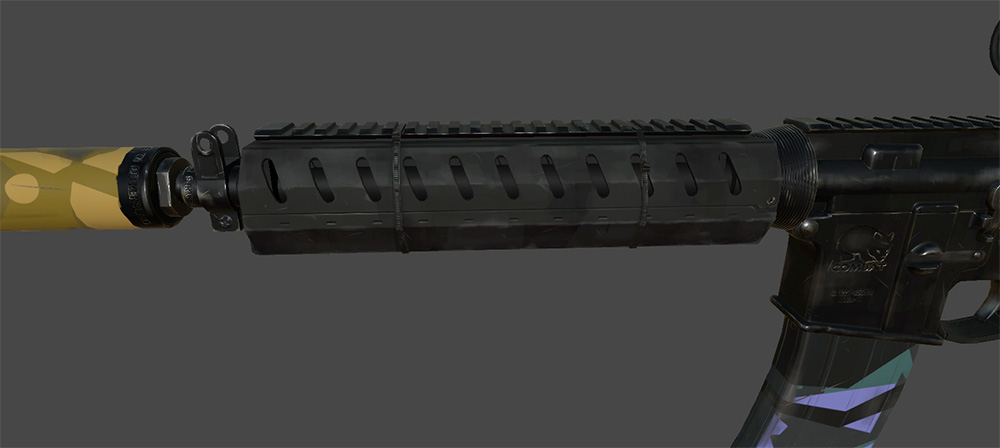
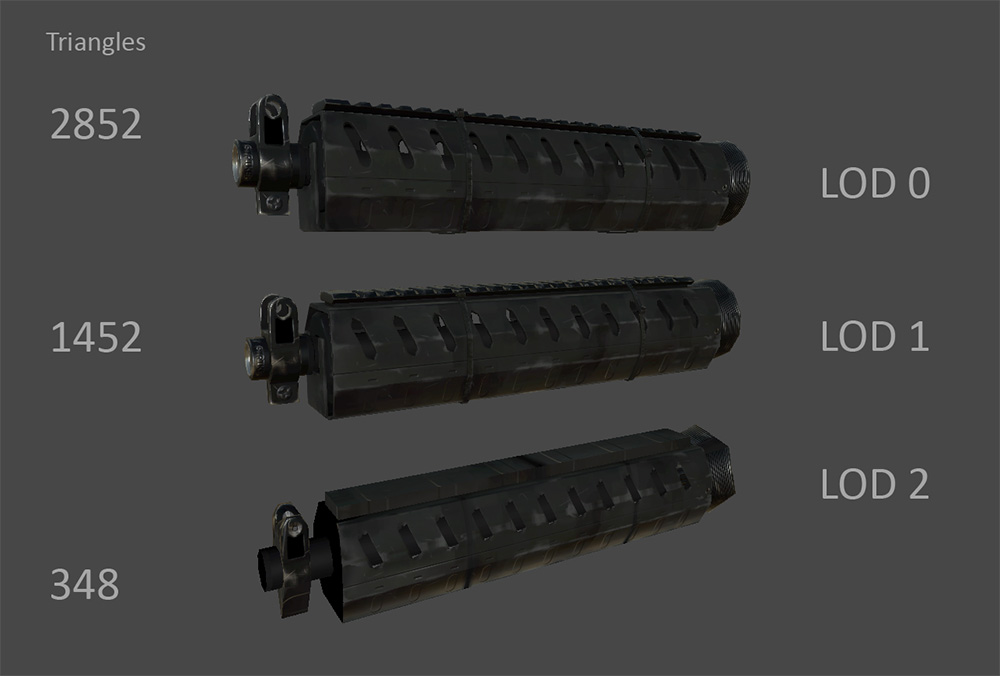
I finished another barrel guard this week, it’s quite a techy looking little number. It was a bit more difficult to get the normal maps on it right, but I got there in the end. I was going to push forward on the rest of the 2nd set of components but due to the need for LOD’s (Level of Detail) meshes I switched over to that. Tom is updating the Static Mesh Baker again, to be more efficient and more artist friendly (thanks Tom) We need LOD’s for that and possibly the inventory system, so I am smashing through them early this week. The Static Mesh Baking tools will be not only appreciated by me, but by anyone wishing to Mod Hurtworld. They have come so far in a short space of time, making it soooooo much easier to create static meshes for the game. Static Meshes are used a lot, and the improved tool set is a big time saver and brain melt saver also.

NewGraphicShader_0001_Layer 5 NewGraphicShader_0002_Layer 4 NewGraphicShader_0004_Layer 2

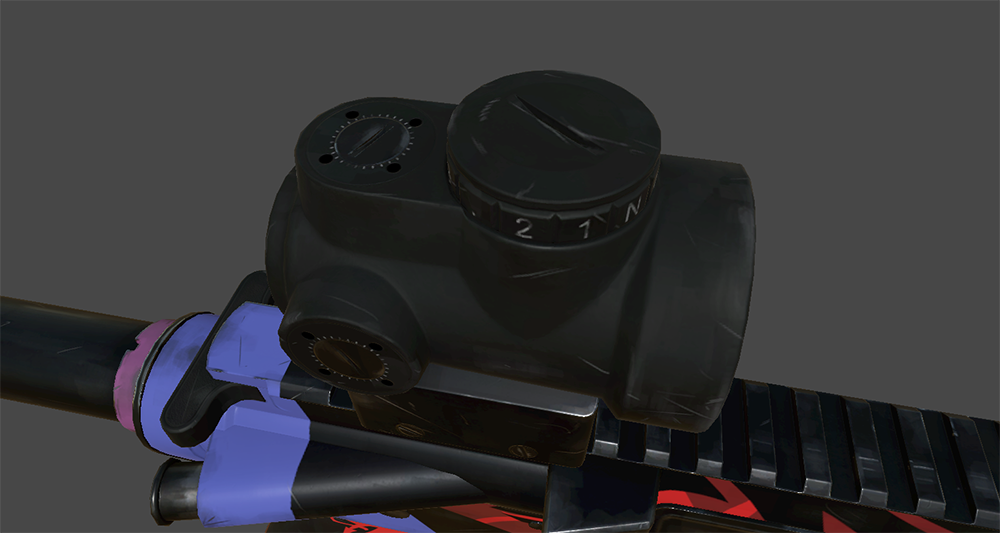
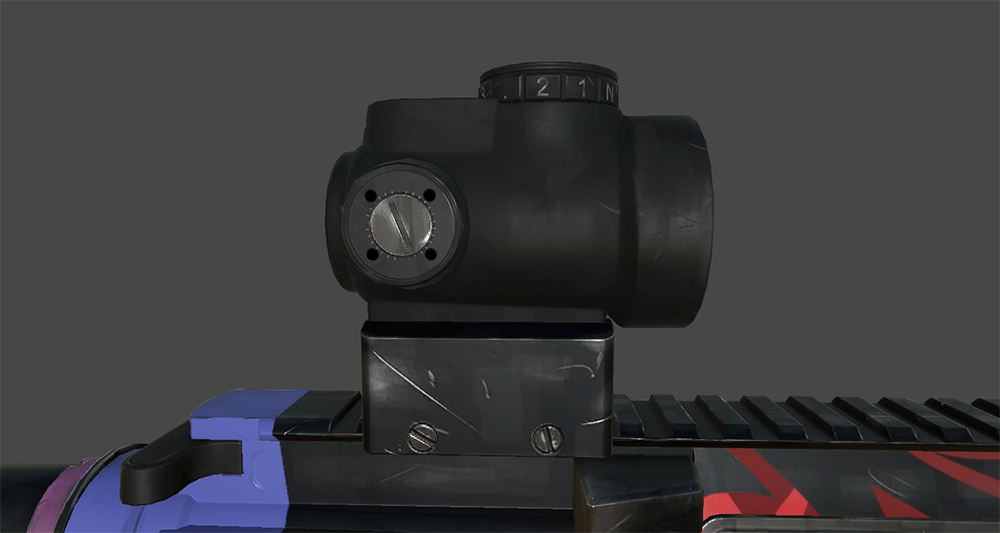
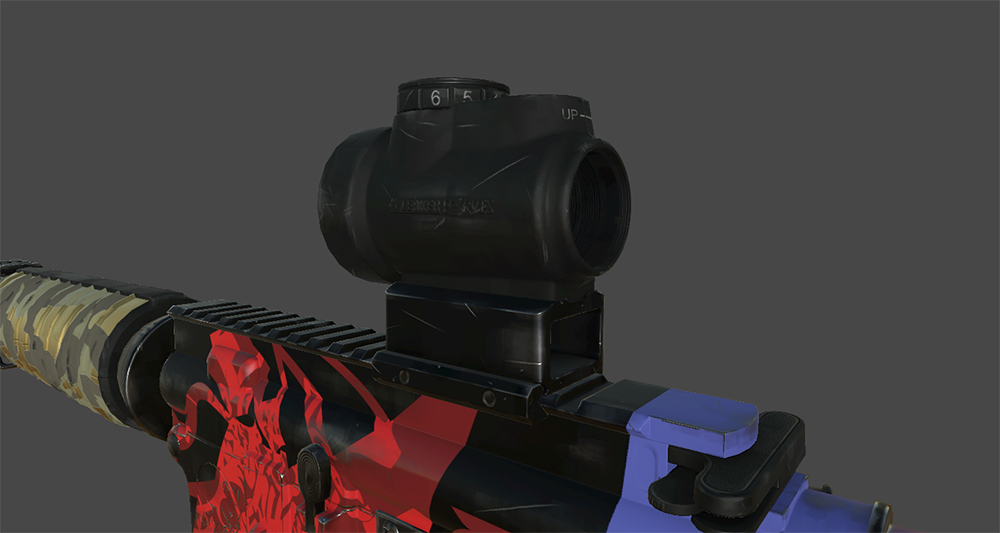
The top LOD will be what the First Person sees, the second one down will be used for situations like inventory, world items, medium distance versions of the guns equipped to the player and any other situation where the highest LOD just wouldn’t be the focal point. The bottom version would be for when the object is fairly distant, for example 50 metres away and further. These only need to convey the silhouette and colour of the object.

GunLODS_0001_Layer 1

Cow_Trix

Icons

Hey folks, this week I’ve been bug-fixing and stress testing the new item visualisation stuff. I improved caching a lot, and added support for complex items like guns built from multiple sub-components, vehicle parts, machines, and more. Realtime icons now support custom colors, and the way I ended up caching them means that cool things happen like if two different guns have the same components and colors, the icon rendering system will have them share a texture and world-item data. I cleaned up responsibilities and structure a bit so now items don’t actually know anything about the concepts of icons and world-items, that’s all completely component based now.

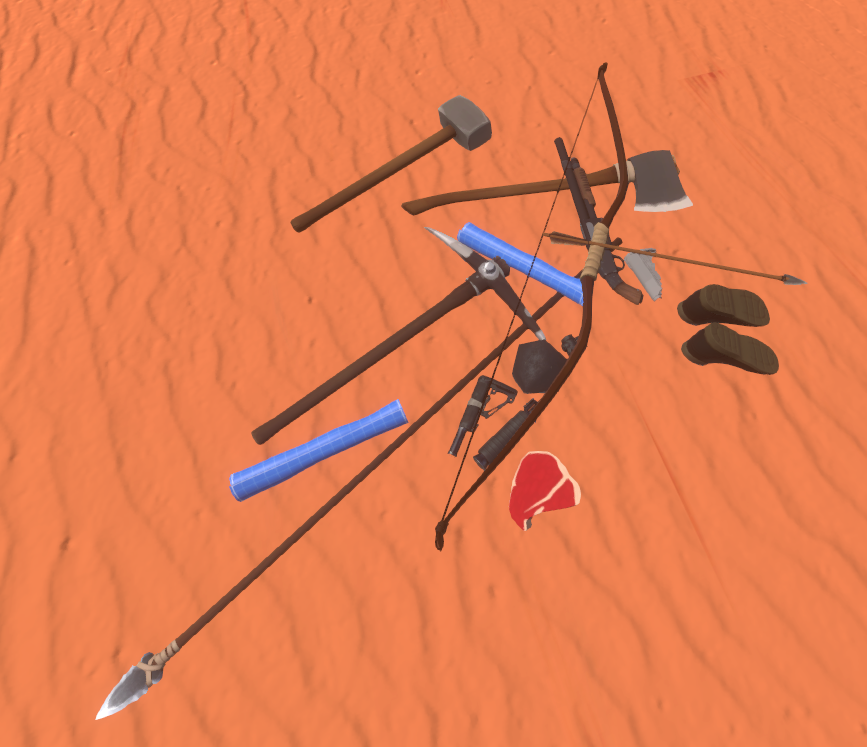
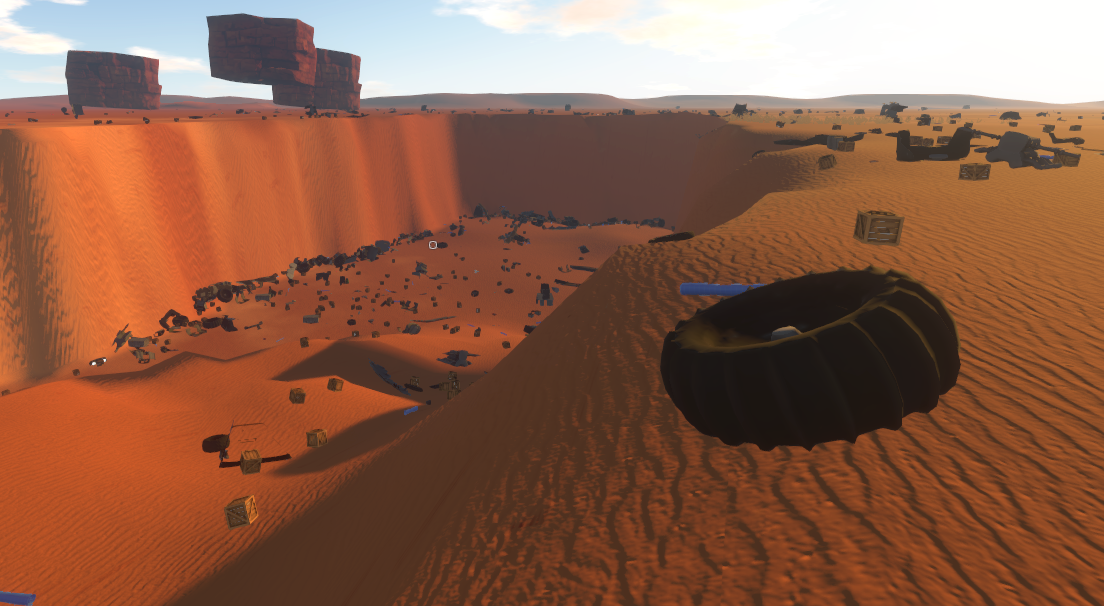
I also stress tested the world item generation and I’m pretty happy with where that’s at. The biggest bottlenecks are now in the mesh baking system, which Tom is in the process of moving to a different thread. When that is done, even spawning hundreds of world items in a single frame shouldn’t cause that much of a stutter. I had to change how items are synchronised between the server and client, as we didn’t have a concept before of non-equipped items that needed to be synced to all local players – important so when a player drops an item that none of the other players around them know about, the server knows to tell the surrounding players everything they need to know to render it. You can see some screenshots below of me spamming spawns and ending up with a landscape littered with various objects – and it all performed pretty well!

pasted_image_at_2017_03_31_17_35

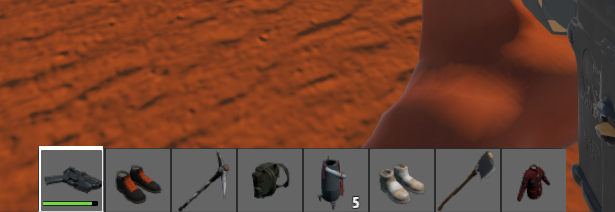
Next up is figuring out some changes to the inventory and hotbar, that we’ve briefly discussed in past dev blogs. We’re going to take a look at multi-slot items, which will mean that there’s plenty of room to render pretty icons, as well as changing up the hotbar to maybe be more of a shortcuts bar than an actual storage space.

Tom

This week I’ve been working on improving the new spawning system as well as our mesh combining / baking tools.
The spawn window has been redesigned as more of a game over screen for the survival game mode. After dying and watching your ragdoll fall down the game over screen will show, displaying your cause of death as well as the options available to you. The cool thing about these options is that some or all of them can be set dynamically on the server with the option to set a time the option becomes available (to implement things like spawn cooldowns). Just for testing I changed up our spawn behaviour so spawn options were given to spawn at any authorized stake (very unlikely that this will ever make it to live though as it incentivises suicide for travelling and also helps players not be in the world therefore avoiding fights) but ultimately it’s up to the type of game mode to implement its potential options and because it’s defined from the server, oxide mods will be able to add their own options in.

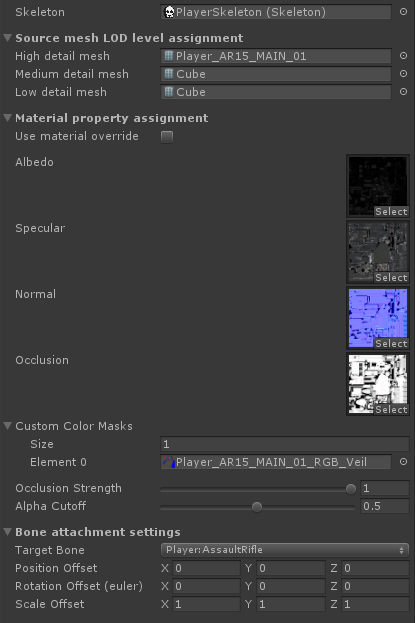
I’ve been giving our whole mesh tools pipeline a bit of an overhaul. The mesh attachment class that holds all the mesh data (things like vertices, normals, uvs, triangles, bone weights, etc.) no longer needs to be managed by the content author, instead they manage a configuration asset that references all the data needed to create mesh attachments. The mesh attachments themselves won’t get built until building the mod (in ItemV2 ALL our content is implemented through default mods) or they can be built just in time if they are required by the editor (ie. for previewing the item). This gives us a few benefits, the workflow is much simpler for one, once the configuration file is setup the artist can make changes to the source file in their tool of choice and have the item automatically update in game after rebuilding the mod. Another advantage is that we store all the material variables without assigning a material (although a material override can be specified if not using our generic custom color shader) allowing us to defer material creation and assignment until later. This will let us do things like atlas a few items together so they share the same material (saving on draw calls).

NewMeshAttachmentConfiguration

I’ve also been working on making the mesh combiner / baker do most of its work on a separate thread. This gives us a huge performance gain as Unity no longer has to wait for a bake operation to complete before it can move on and render a frame. Now the main thread queues up the bake jobs while the worker thread takes jobs out of the queue, combines the group of mesh attachments then runs a callback on the main thread again to push the combined data into Unity’s mesh class (this is done because Unity’s API is not threadsafe, anything that inherits from UnityEngine.Object can only be touched in the main thread).
I’ve got a basic version of this working now but I need to extend it to handle some of our special use cases (like assigning new custom UVs for color lookup in the event the assigned texture space is taken by another item) so I’ll be doing that through the coming week as well as extending the vehicle LOD system so it affects all combined meshes.

TEHSPLATT

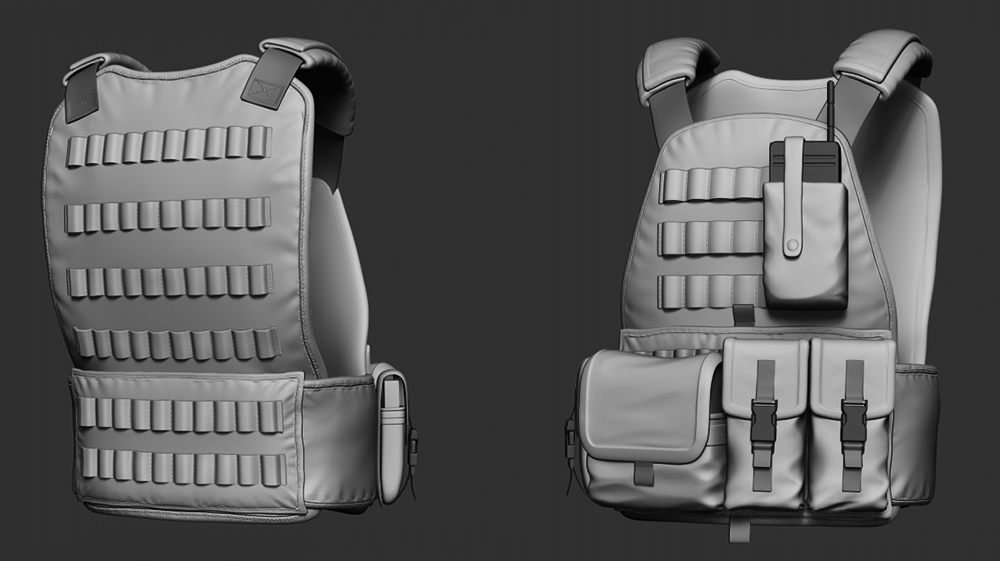
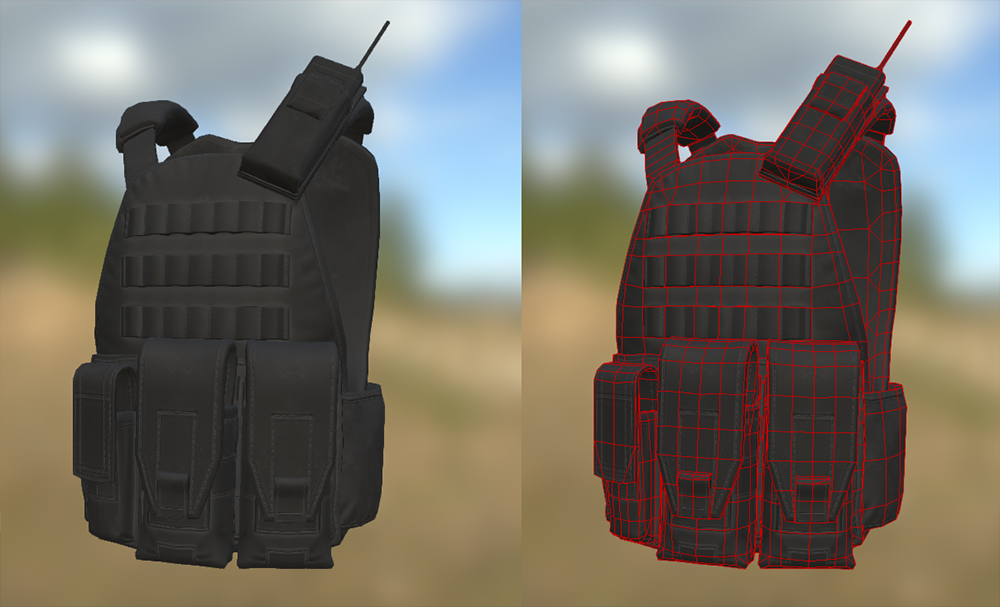
Hey people, this week has been spent finishing off assets on the vest and getting it to a game ready state. I’ve had to spend a lot of time refining my workflow since my first day here which has slowed down my work output a bit but it’s definitely been for the better. I’ve been building my models/sculpts up from a much cleaner state than before which means very little to no time spent trying to massage out lumps and bumps that are going to show up on the normal map, this allows for a much more readable final model that Unity won’t have a problem with. As you can see in the vest below, the surfaces have very little in the ways of lumpy detail while still having enough information to suggest different types of materials, this can be a difficult balancing act to get used to. The texture used for this picture is a plastic/rubber test material just to see how nicely the high res sculpt baked down, as you can see by the wire frame to the right, the mesh has a pretty low triangle count (around 3700) but can still go a fair amount lower without losing the over all silhouette. The pouches can also be used on other vests and have their UV maps layed out in such a way they can be scaled up to take up a single texture sheet of their own or scaled down and fit nicely into other clothing UV maps without changing any actual UV islands. The process after this step will most likely be working out a good looking colour scheme (possibly changing the pouch arrangement) and getting it set up in Unity to test in game.

MilitaryVest_Test_Mat

Spencer

Hey guys, this week I’ve been working more on filling our new systems with content. I made a pretty big breakthrough with connecting different semi detached systems together via a thing I call reference curves. The problem they are designed to solve is, as the depth and breadth of our progression grows, configuring simple things like item recipes, damage of weapons, armor resistances etc creates a level of configuration paralysis where there really isn’t a way to keep all the required information in my head at once to get something close to balanced in a reasonable time.

Example
An example is PVE weapon damage. As you progress through difficulty tiers on the map, the health pool of the creatures you will face increase along with their damage, and other properties. To keep things interesting, we increase most stats at an exponential rate.

LinearProgression2

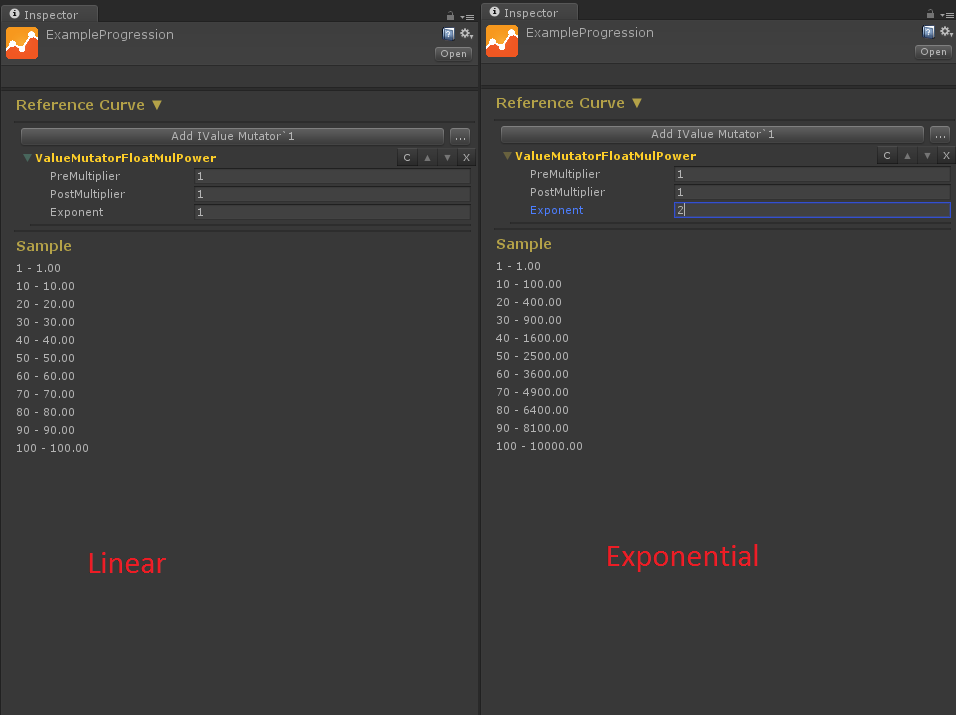
The reason linear increases are shitty for RPG progressions, is this: At level 1 you start with a bow that does 1 damage, all good. Then you level up to 2 and get a new bow that does 2 damage! You can now kill the same creatures twice as fast with double the damage of your previous weapon, you are pleased. Fast forward to level 75, your bow does 75 damage. You level up to 76 and get a new bow… your bow does 76 damage 🙁 a whopping increase of just over 1.3% which will have almost zero impact on your ability to kill stuff.

Just a quick disclaimer on the word “Level”. It’s not a level in the classic sense of the word, we’re not introducing experience or anything like that, it just helps us compare things that we expect to be at a similar level of balance.

By using an exponential progression, our numbers increase faster as we get higher level keeping the feeling of the upgrade well into the levels. The tricky part about this is we have hundreds of pieces of configuration to create that all depend on this curve. When authoring a weapon for a specific part of the progression, we need to ensure that its stats match up around what everything else will be around that level. Eg: a weapon’s dps value needs to be in the same order of magnitude as the health pool of the thing you are attacking.

Reference Curves
The real questions I am asking myself while designing much of the content is things like:
“What damage should this bow do to kill a creature in 4 hits at its equivalent level”
“How much wood could a player around level blah farm in 20 mins”
“What sort of temperature would I expect to have to deal with at level blah”

Having to continually figure out exact values for these questions for specific parts of the progression was mega tedious. My solution was to in a way store the exact question above.

This is where ReferenceCurves come in, they are an asset object that can be defined in our project (or mod), that represents a value as it progresses through the levels. Then when designing content, instead of saying this bow does 10 damage, or designing a damage curve per level on the bow item, only to have to do it again on the next item, we can defer to the reference curve for the answer to common questions.

A concrete example is a reference curve that represents “Creature health per level”. When mapping the PVE damage of a bow, I can now say “get the value from this curve and multiply by 0.2” which will set the bow to kill a creature of equal level in 5 hits. Obviously this isn’t going to be exact as creatures have different health pools, this is fine as long as we are in the right ball park.

This then lets us tweak the base health curve of creatures per level and equipment that is dependent on it will update automatically. However this sounds pretty boring, if everything is perfectly balanced always it will feel like Oblivion.

We can go one step further and slightly decouple player to creature DPS and creature health pools by creating a player to creature DPS curve that references creature health and can be manipulated relative to the creature health.

creatureleathoffset

Configuring a weapon now looks like this:

mutatorgeneratormapping

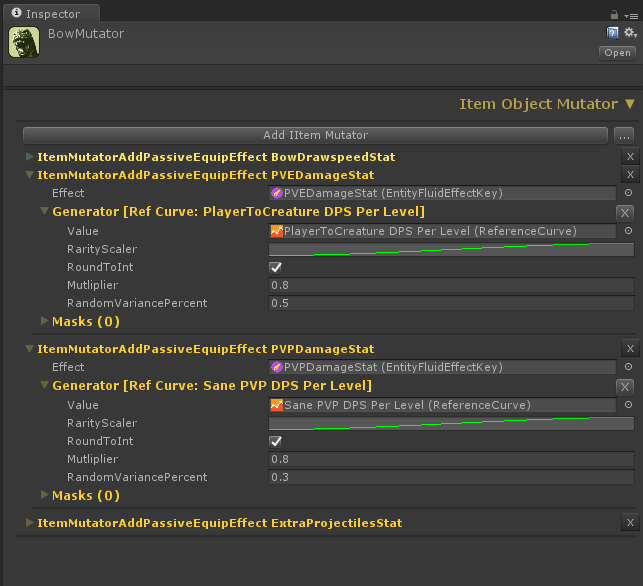
Then when creating the recipe for the blueprint for this item, I can instead of hard configuring “10 wood, 15 metal” etc, I can configure “0.2 x wood farm per hour”, “0.5 metal farm per hour”

We can now write new content without thinking about stats or value ranges at all. If there is something we don’t know yet, we can create a curve for it, refer to it and figure out the formula for it later. This creates infinitely faster generation of content. These curves will also not only be referable from mods so you can slip content into our pre-existing progression with ease, you can also override any reference curve formula to tweak the balance of your server. Want creatures to do more damage? Change one curve. Think the crafting cost of blueprints is too high for wood? Change the “Expected wood farm per hour” curve. The most important thing here is that this allows us to not lock in a heap of work into a specific set of numbers. By deferring the balancing to very simple config files, we can easily tune our progressions in the likely case that what we initially come up with is shit.

Hurtworld Update #74

TEHSPLATT

Hey guys, so this week we decided that a character update was not a priority as it would have been a whole lot of work to get to exact same point that the current character is at. After coming to this conclusion we decided to move onto gear creation and a tactical vest seemed like the perfect starting point. This is the first pass on the vest, a lot of things are still just place holders and need proper cloth folds and seams but so far so good. After trying out the new Zmodeler tools in Zbrush I’ve realized that I can build something like this almost (if not) entirely in one program, which can really speed up my work flow and allow me to build stuff like military gear and other clothes faster than ever before. Going to run some tests in the next day or so to see how well something like this will look in our game environment.

Tactical_Vest_Pass_1

Mils

I was working on the ‘DLC” (Diemens Land Crew) graffiti skin last week, but we decided to switch gears and get all the current attachments done for the AR15. This will add a second attachment for all the slots on the gun and will help with balancing and development of the attachment systems. This will let me go full steam on model production. I am at the UV layout stage of a second Barrel Guard and should have the baking and texturing done tomorrow.

NewGraphicShader_0000_Layer 3

I added a couple of cable ties and dents to break up the large flat surfaces of the new guard.

NewGraphicShader_0001_Layer 2 NewGraphicShader_0002_Layer 1

Cow_Trix

Hey folks. This week I’ve working more on realtime icon rendering, and it’s coming along pretty nicely. A lot of optimisations and neatening up of the architecture have happened so things are running faster.

A recurring problem has been the handling of caches for these assets. If you ask an item what it looks like often, it’s better to save that information somewhere rather than making the item do work every time. This means that you want to tie that item as a key for some data object as a value. I wrote a little data structure that does the job pretty well, as a limited-size dictionary. You can just set the maximum size of the cache, and what it should do with elements that it pops out the back (like properly releasing RenderTexture or Mesh objects). It has a concept of when items were added, so when the cache gets too big it releases only the older objects. It’s pretty handy and it’s formed the backbone of both the data on how to display items, and the actual render textures that each itemslot is pointing to.

I also vastly improved the auto-zooming functionality for item rendering. If all you want is for the item to be rendered at a certain angle and you’re happy with automatic zooming, you can tell the item renderer to just try and find a best fit of the mesh. Previously I did this by placing the camera right at the origin of the mesh, and then iterating back, testing the camera planes every time to see if I was zoomed out enough. However, this just wasn’t fast enough. Although I managed with some optimisation to get it down to only around ~10 iterations, the basic math was just too expensive, so I came up with a different tactic with some nice trigonometry, you can see it below. As a tip for any game programmers – when solving geometric problems, start in 2D!

maaath

So you can see the result of this below – some procedurally rendered item icons and world items! Next up is adding effects and animations to items that need them, which will be an interesting job to do quickly. There are still a few issues to iron out with icons around getting the render texture to the UI without the blurryness and aliased edges, but most of the hard work is done.

newIcons

worlditems

Tom

This week I’ve been finishing up work on the 0.3.8.4 patch mostly which is rolling out as I write this, you can find the patch notes in game or here.
Thanks to everyone reporting stuff, you certainly are keeping me busy! We received many reports regarding a crouch desync bug where the server and client could get their crouch states mixed up. This would then lead to client predicted movement always being wrong and having to be corrected and players were in turn abusing this to be able to briefly look through walls and scan other players bases. Luckily we had a fix already implemented in itemv2 which was faster than expected to transfer back into the live branch. Now crouch state (and camera perspective) is properly serialized and synced across the network rather than trying to derive crouch state from player input and other data.

Another fix I worked on was removing a bug where the emote manager could get out of sync. Previously after some chaotic spamming of an emote it was possible to get an extra ‘StartEmote’ trigger that hadn’t been used yet whilst already being in an emote. This meant when you went to exit the emote the left over trigger would fire immediately after leaving the emote animation, returning you into the emote animation but unlocking all movement and allowing you to use equipped gear (like fire your guns). Now this trigger is explicitly cleared on emote exit.

The other big change in this patch was removing rigidbodies (Physics objects) from many objects.
The character controller component that we use for player movement has an easier time resolving collisions against static colliders (objects without the rigidbody component that enables simulation) so we’ve removed rigidbodies where we can to hopefully reduce players being able to penetrate through solid objects like storage chests. In older versions of Unity you needed to have a rigidbody on any collider that would move but now we only need them on objects with actual physics simulation (like vehicles) or if an object needs to be able to set off triggers (like the player). Another plus is that not having rigidbody means moving and rotating object has less of an overhead so we should see some small performance improvements from this change also.

Spencer

This week I’ve been experimenting with the best ways to structure our content and thinking through the new ItemV2 progression. There is an enormous amount to think about here, like what creatures spawn where, what properties do they have like speed, damage, colors, size, rarity, health etc. Then once they are killed, what they drop, how much they drop, when they drop a recipe, how much of what resource that recipe should cost, what environmental effects are trying to kill you in each area, how loot from creatures of that area can be used to counter such effects, how those resource should scale up as you progress into tougher areas.

Resource scaling can be approached from a couple of different angles, by increasing volume output and volume requirements (eg: tier 1 boar drops 1 leather, basic clothes cost 10 leather, tier 2 boar drops 10 leather tier 2 gear costs 100 leather), or by changing the actual resource as you tier up (eg: tier 1 boar drops leather, tier 2 boar drops 1 Amazing Leather).

After trying to design all this stuff using spreadsheets and difficulty curves, I’ve gone back to basics of throwing a bunch of stuff into game and playing around with it till it feels right.
There are too many variables to think about at once to get interesting synergies between parallel progressions.

Right now I am testing a build where Shigi’s are basically slot machines, dropping blueprints to upgraded bows that hunt shigis better. Once I get something together that has the magic fun element to it I will put it up on experimental.

I spent half an hour dicking around with the gun painting system now that the AR is mostly complete, here are some glory shots!

Pasted image at 2017_03_21 08_32 PM
Pasted image at 2017_03_21 08_54 PM
Pasted image at 2017_03_21 09_13 PM

Pasted image at 2017_03_21 09_00 PM

Pasted image at 2017_03_21 08_33 PM

Hurtworld Update #73

Spencer

This week I’ve been focusing on content design, implementing more of the procedural stat wishlist and refining the weapon feel. The bow in the current public Hurtworld is awesome, its a lot to live up to for the ItemV2 version, since the upgrade the bow hasn’t quite felt the same. I spent a few hours refining it and found a few bugs in the way we do projectile direction calculation and drawback speed.

Part of the ItemV2 weapon system is the ability for a weapon to specify a custom camera configuration for different stances and sighted states. I spent a bit of time creating a custom one for the bow in third person, and the results feel awesome (Note the accuracy of the third person cross hair now matches that of first). I will probably use this as a base for all third person weapon cameras.

Next I implemented the stat wishlist for bows, most notable of which is the rare chance to get a bow blueprint with bonus projectiles on fire.

The number of bonus projectiles and the spread pattern is all stat driven, don’t think we will go crazy with this but might make for some interesting mods.

While I was at it, I decided to give my new projectile system a bit of a stress test. Most of you would know I am pretty OCD when it comes to performance, and the new projectile system is one of the jewels of ItemV2. I set the bow to distributed circle pattern and set the extra projectiles to a ridiculous count of 500 per shot. Expecting my FPS to tank, the results were amazing. FPS drops barely even register at 1000 projectiles in the air. Also notice that there is very little additional network traffic happening (and all projectiles are server authoritative). What this means for you, is even on shitty PCs, you can trust that you’re FPS won’t tank in a firefight (at least not because of gunshots).

Tom

This week I’ve been continuing on with work on the spawn window. Now it’s up to the game mode if it uses the spawn window, when it uses the window and what the window does.
I’ve also improved how you access the spawn window, in a compatible game mode you’ll be able to open the spawn window from the main menu to make changes which will apply on your next spawn. Rather than showing the spawn window on every respawn there is an option (if the game mode chooses to use it) for the UI will now show a small prompt to open the window if the player chooses, if not they will spawn with previously chosen options.

Thanks to player reports I’ve also spent some time investigating some bugs from the last update and working on another small fix patch. This will include a fix for plant construction being incorrectly denied, fixes to the desert aircraft carriers collision mesh which was making it impossible to get up from a crash inside it and also causing it to incorrectly set off the inside rock check killing the player.
Another bug was discovered where if you crashed with a vehicle on top of you in a certain configuration you could stand up inside the vehicle which was leading to all kinds of crazy behaviour. To address this I’ve changed the ‘can get up?’ check on crashing to include vehicle colliders, this was a little tricky as crashing is implemented by placing the player inside an invisible ‘crash vehicle’ so the crash vehicle needed to become aware of its own colliders and check that any colliders preventing the player from getting up weren’t from the crash vehicle itself.
I also made a change to the movement rewind system due to some of the crazy behaviour we witnessed with this bug. Now if an illegal move is detected, vertical velocity is set to zero (as well as the position being reset to the pre-move position like before). This fixes the craziness we were seeing where if you were stuck inside a vehicle on the server you could fly around a little on the client because it was trying to predict from the corrected state using the old pre-rewind velocity. This also flows on to improving player to vehicle collision resolution in general which will help again in the fight against rock bases.

Mils

I got the Silencer and Red Dot Sight finished this week. They are looking purdy. Now I will start to add the designs to them and push on with some more complete design sets. I will rework the ones I did for testing also, making sure to put the finishing touches on them. I did a little more testing with gradients on the Colour Mask Overlay shader, which turned out pretty sweet.

SilencerRedDot_4 SilencerRedDot_6 SilencerRedDot_5 SilencerRedDot_3 SilencerRedDot_2 SilencerRedDot_1 SilencerRedDot_7

TEHSPLATT

Not much to report, Still sorting out the work flow for the characters, after figuring out how Unity handles normal maps I’ve had to make some changes to my workflow, with these changes I will be able to get assets through the character pipeline much more efficiently.

Cow_Trix

Hey folks, this week I’ve been working on a new system for rendering icons. Currently icons are just little sprites that we make ourselves, and that’s worked up until now, but with procedural dynamic items on the way it’s become obvious we need something new. I’ve been working on something to enable any item to be rendered in the UI as a little item sprite, as well as putting together tools for dynamic world-item creation.

So the first issue is dynamically generating all the data needed to render an item. The workflow I’ve been setting up goes a little like this: Firstly, in the SDK, you configure how items or generators set up the player skeleton and render camera, in order to render out the item icon. To do this easily, I built a little mini-mod loading framework that you can use in the SDK, so you can load the game’s assets and your own to set up this configuration. You pretty much select the character that the item is going to be used with – usually the player – which will generate a skeleton. You can then position and distort this skeleton however you’d like, in conjunction with setting up the camera to the right angle, FoV, etc. This then generates a little configuration file that items can point at and say “this is how you render the icon of me”.

As for the actual rendering, there’s going to be a little extra camera working under the hood to do renders of items and push out RenderTextures. Generating the mesh to render these texture with is an interesting problem, especially because optimally we want to use this same mesh to create a world-item. We’ve got to get all the meshes, distort them with the skeleton we made in the previous step, and then bake them out into some static representation. The tricky problems are going to be managing our VRAM allocation, safely disposing all of these managed objects (textures and meshes are never garbage-collected in C#) and being able to create the world-items of a shitload of items and render them all in a short amount of time. You can see the little proof of concept I got working today below, but there’s plenty more work to get it to a finished state. On the plus side – you won’t need to make icons for all your custom stuff!

Capture

A lump of coal and a dick crate! #progress


Dev Blog